AI content production pipelines can save you four or more hours per piece of content — if you build them right. Going from one YouTube video every two weeks to one every three days sounds impossible, but it’s exactly what happens when you stop treating AI as a tool you pick up and put down, and start onboarding it into your process like a team member. This article breaks down the four levels of AI in any workflow, shows you how to build a multi-agent content system in Notion, and walks you through a real pipeline that handles everything from transcript to published blog post — including a German translation — without any human attention after the initial trigger.
What Are The Four Levels Of AI In Any Workflow?
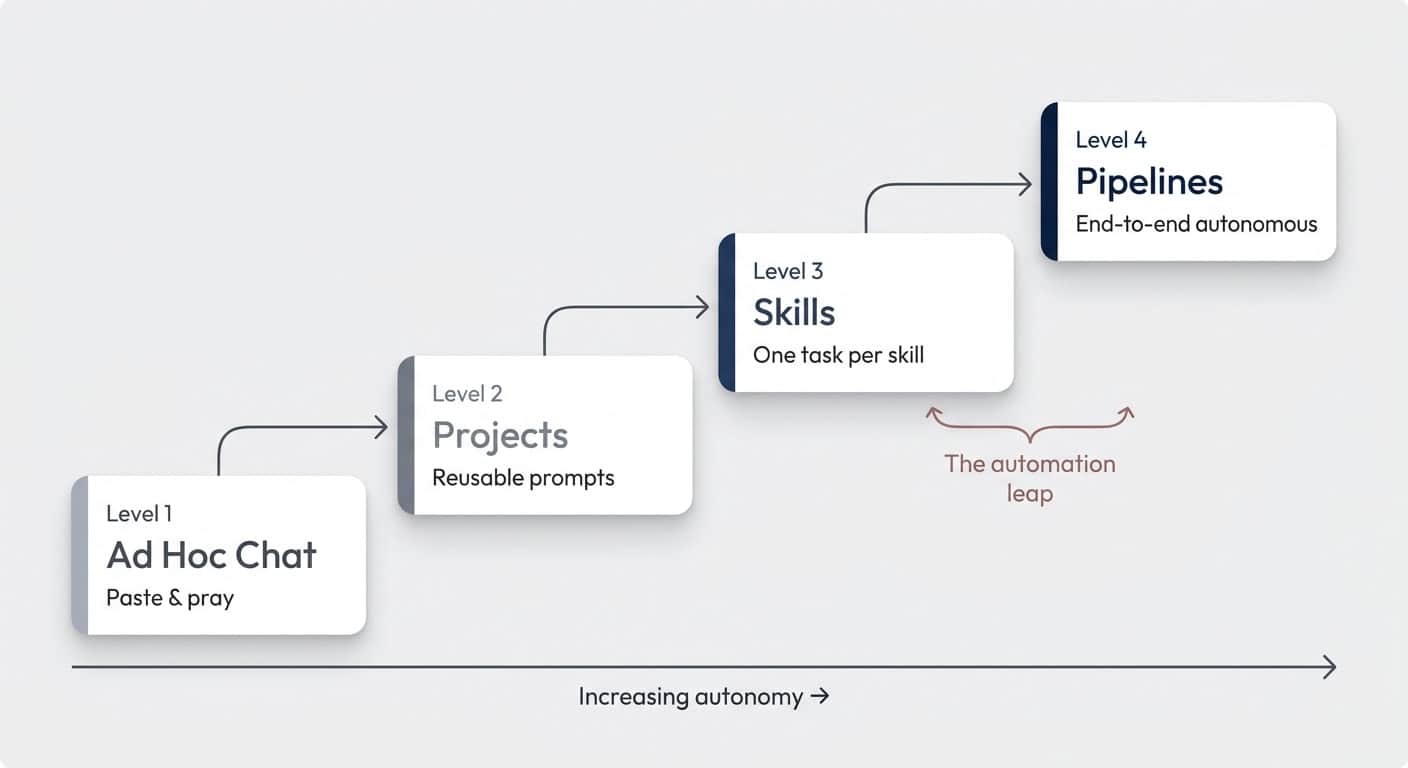
Before you build anything, you need to understand where you currently sit — and where you’re trying to get to. There are four distinct levels of AI integration that apply to any repeatable process, not just content.
Level 1: Ad Hoc Chat. You paste your YouTube transcript into Claude or Notion AI and say “turn this into a blog post.” The results are mediocre because the AI is working from hidden assumptions. It doesn’t know your voice, your structure preferences, or your audience. At this level, 90% of the work is still you — the AI just provides a rough starting point.
Level 2: Projects. You create a dedicated project in Claude or write a reusable master prompt in Notion. This means feeding the AI past examples of your work, explaining your style, and building up a specific set of instructions over time. Every time you create content, the AI adds its learnings to the system. This is where you start seeing genuine time savings — even on smaller tasks like writing YouTube descriptions and chapter timestamps.
Level 3: Skills. You realise that “create a blog post” is actually six different tasks pretending to be one. Outlining, drafting in your voice, internal linking, SEO metadata, image generation, translation — each of these deserves its own dedicated skill with its own instructions and context. Breaking things down this way lets you go much deeper on each step and makes feedback loops dramatically easier. This approach is what we call Notion AI Skills engineering — treating each transformation as a dedicated, specialised step. The catch? You’re still the coordinator, manually triggering each skill in sequence.
Level 4: Pipelines. You connect everything end-to-end. Drop a transcript in, and AI moves it through every stage autonomously — writing, linking, assets, translation, publishing. No human attention required after the initial trigger. This is where the real leverage lives.
The key insight: you don’t jump straight to Level 4. Start at Level 1, identify the repeatable patterns, and work your way down. Each level builds on the one before it.
Want to build this yourself? Get 6 months of Notion Business with AI included free to start experimenting with AI-powered workflows.
Pro Tip: The fastest way to move from Level 1 to Level 2 is to start with the most annoying 15-minute task in your workflow — not the biggest one. For content creators, that’s often writing YouTube descriptions and chapter timestamps. Small wins build the muscle memory for bigger automations.
Why Should You Break Content Creation Into Individual Skills?
A single AI prompt trying to handle your entire content workflow will always produce worse results than a chain of focused skills — for the same reason a generalist employee underperforms a specialist team on complex projects.
Each skill should handle exactly one transformation. In a YouTube-to-blog-post pipeline, that means separate skills for structuring the outline, drafting the article in your voice, optimising internal links, generating visual assets, preparing SEO metadata, and translating to other languages.
The reason this works so well comes down to a concept called progressive context disclosure. You only load the context relevant to the current step — nothing more.
When your AI is figuring out the article structure, it doesn’t need your brand voice guidelines cluttering the context window. When it’s drafting the actual paragraphs, it doesn’t need your affiliate link list.
Loading everything upfront degrades output quality because the AI has to hold too many competing priorities at once.
This is also why style guides, link databases, and other reference materials should live as separate documents that skills reference at exactly the right moment — not as part of the main skill instructions.

Pro Tip: The quickest way to improve any existing AI skill is to audit what context it loads and when. Move anything that isn’t needed for the current step into a separate document that’s only referenced at the right point in the process.
How Does Multi-Agent Orchestration Work In Notion?
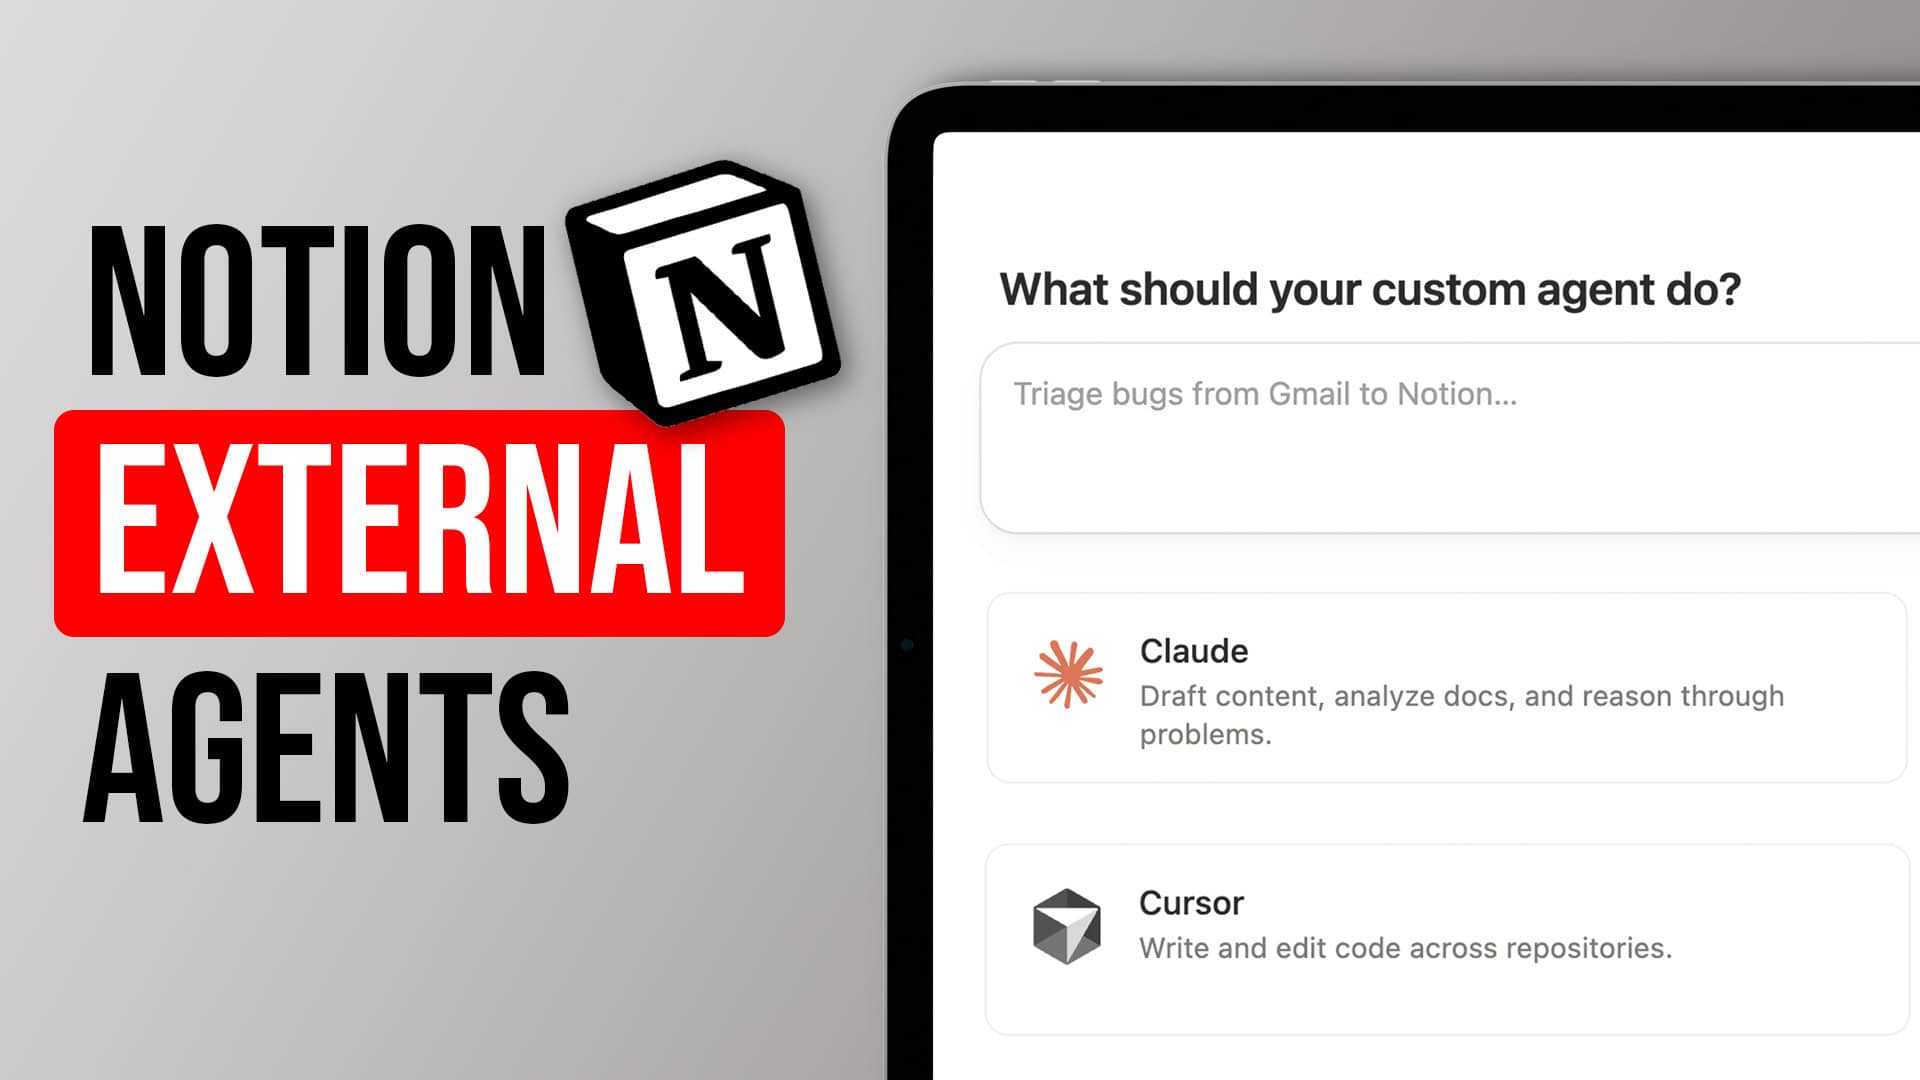
Multi-agent orchestration is the mechanism that turns individual skills into an autonomous pipeline. In Notion, it works through a chain of custom agents that hand off to each other using a single database property.
Here’s the architecture: an AI Stage property (separate from your editorial status) acts as the orchestration signal. Each agent watches for a specific status value, does its job, then sets the status to the next value in the chain — which triggers the next agent.
This is the core principle behind multi-agent orchestration in Notion. When done right, it transforms individual automation steps into a self-healing system.
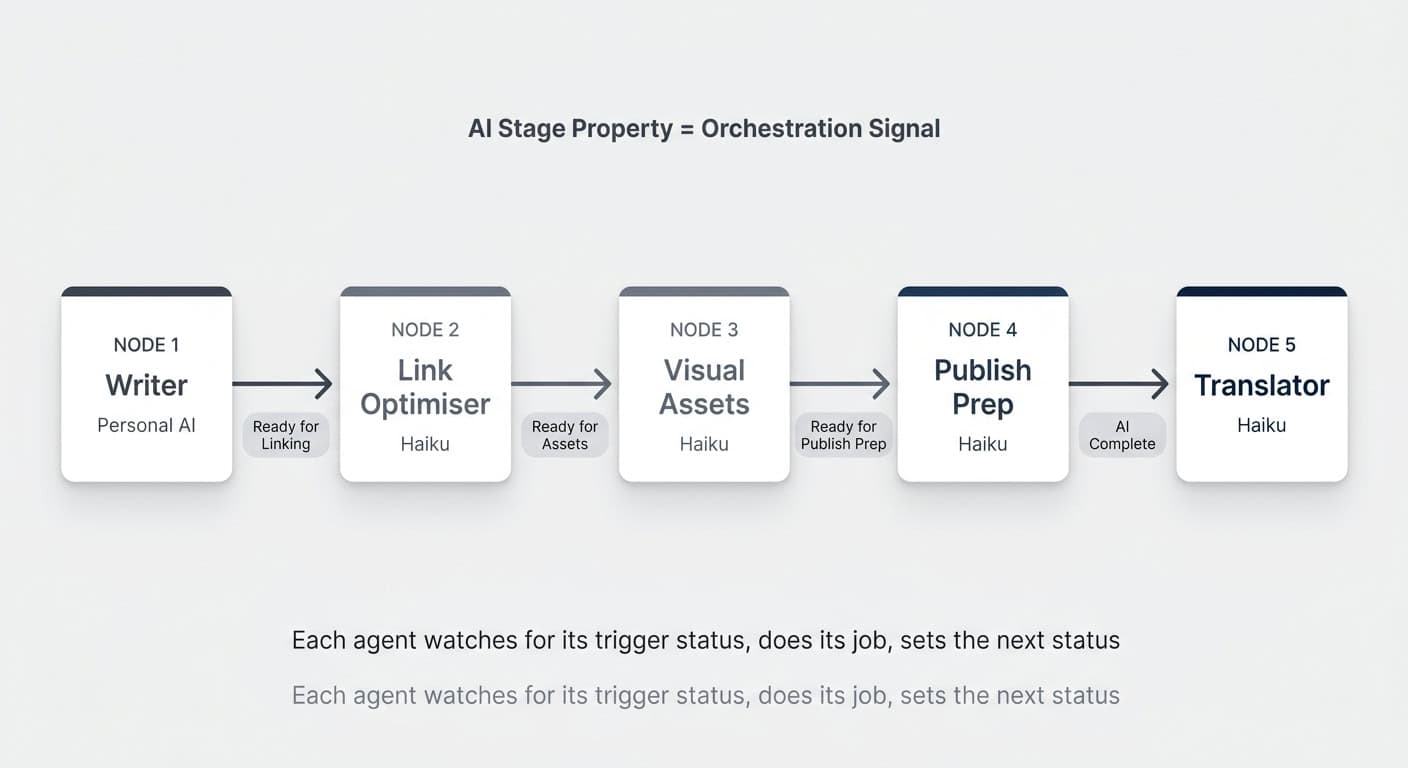
A real content pipeline looks like this:
- Transcript → Article (Personal AI, triggered manually) — Restructures the video transcript into a full blog post. Sets AI Stage to “Ready for Linking.”
- Link Optimiser (Custom Agent on Haiku) — Scans the article, places 5–8 internal links based on existing website content. Sets AI Stage to “Ready for Assets.”
- Visual Assets Generator (Custom Agent) — Analyses the article, plans concept images for key sections. Sets AI Stage to “Ready for Publish Prep.”
- Publish Prep (Custom Agent on Haiku) — Writes the SEO metadata, focus keyword, slug, and meta description. Sets AI Stage to “AI Complete.”
- Blog Post Translator (Custom Agent on Haiku) — Creates a German version of the article with all metadata translated.
Notice the model routing. Only the first step — the actual creative writing — runs on the most powerful (and expensive) model. Everything else runs on Haiku, which is roughly 10x cheaper per run. In practice, the link optimiser burned just 181 credits across six or seven runs over several weeks.
That’s the cost advantage of splitting your pipeline into specialised agents.
The following table shows the full pipeline at a glance:
| Pipeline Step | Agent Type | Model | Trigger | Output |
|---|---|---|---|---|
| Transcript → Article | Personal AI (manual) | Opus / Latest | User prompt | Full blog post draft |
| Link Optimiser | Custom Agent | Haiku | AI Stage = “Ready for Linking” | Article with internal links |
| Visual Assets | Custom Agent | Haiku | AI Stage = “Ready for Assets” | Image concepts + placement |
| Publish Prep | Custom Agent | Haiku | AI Stage = “Ready for Publish Prep” | SEO metadata + slug |
| Translator | Custom Agent | Haiku | AI Stage = “AI Complete” (EN) | German article + metadata |
What Happens When An Agent Fails?
One of the most underrated aspects of pipeline design is error handling. In this pipeline, the visual assets generator currently can’t generate images because Notion’s image generation isn’t yet available as an agent tool.
But instead of blocking the entire chain, it logs what it planned, leaves a comment on the page explaining the situation, and advances the AI Stage to the next step anyway.
This is a deliberate design choice. Build your pipelines so that even if one sub-step fails, the chain keeps moving. You can always go back and run the failed step later — especially useful when a platform capability you’re waiting for finally ships.
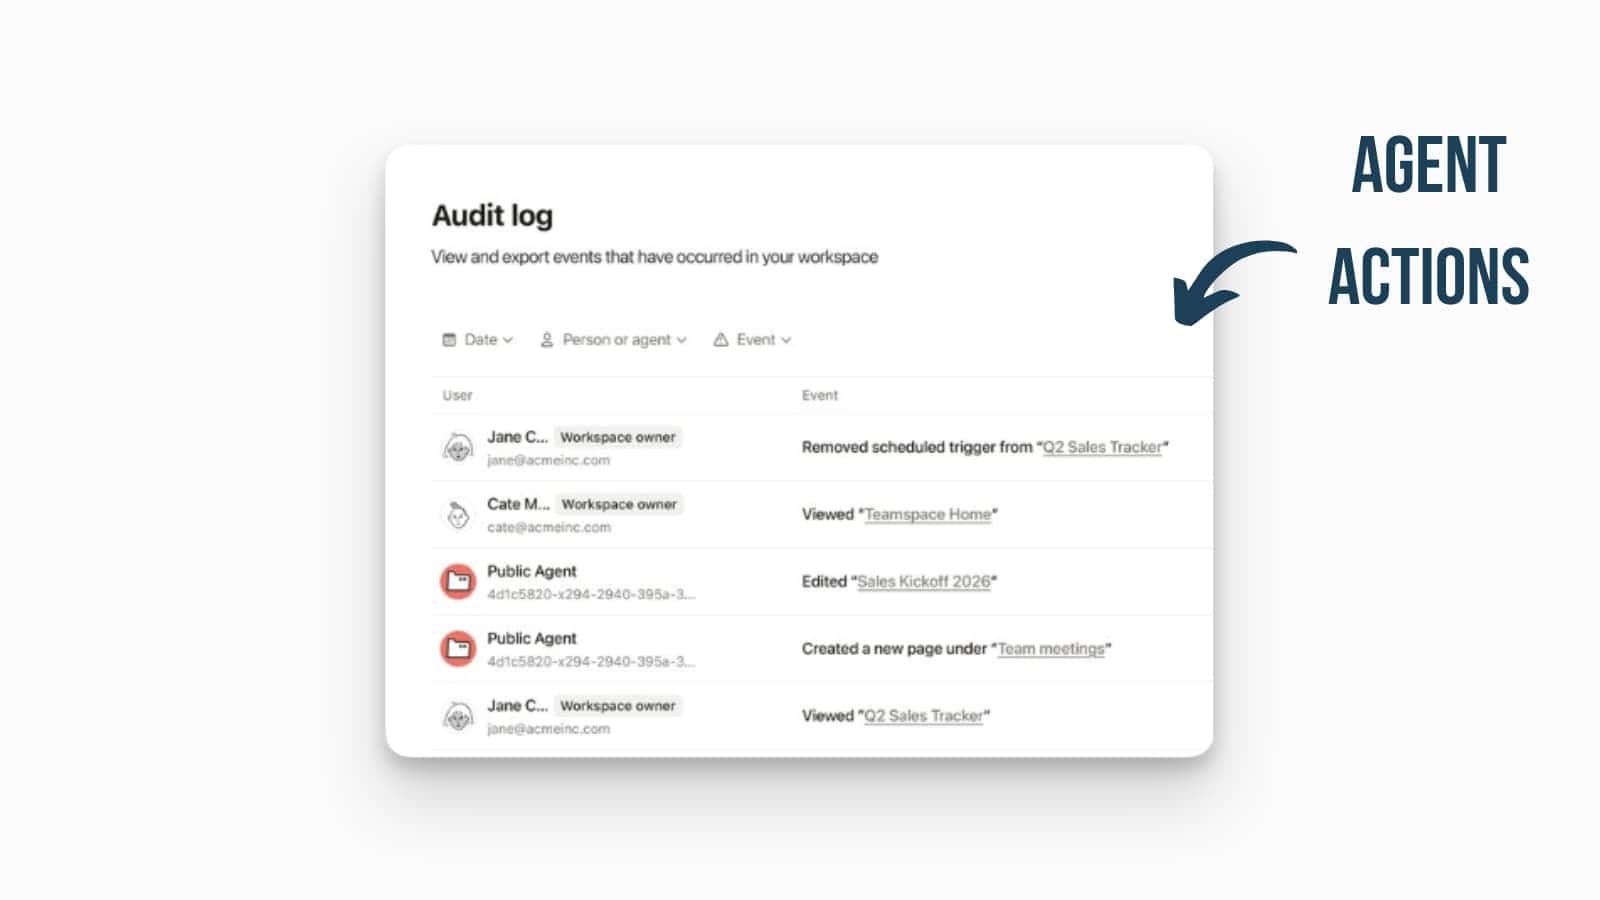
Another benefit of this agent chain: every agent can leave comments directly on the Notion page, creating a visible trail of what happened at each step. It’s the same transparency you’d expect from a human team member documenting their work.
How To Automate WordPress Publishing From Notion
Everything above happens inside Notion. But the final step — actually publishing to WordPress — requires leaving the Notion ecosystem. This is where code pipelines come in.
A webhook fires at the very last AI Stage. That webhook gets caught by a Mac Mini running a simple script that takes the finished Notion page, converts it to WordPress-compatible HTML, and publishes it via the WordPress API.
The entire flow is deterministic — no AI involved, no token costs, just code.
WordPress has one of the most stable and well-documented APIs in existence. Getting a script to read from Notion and publish to WordPress is a solved problem in engineering. Thousands of developers have done it before, which means AI coding assistants like Claude Code can build it for you in a few hours — even if you’re not a developer yourself.
The one tricky part: multilingual linking. If you publish both English and German versions, you need them to reference each other on the front end. The popular translation plugin WPML doesn’t have an API for this, but the workaround was simple — a small custom WordPress plugin that handles the interlinking. Built by AI, running without ongoing costs.
You can also extend this pattern to handle styling. If your Notion content uses callouts or other block types, define how each one should render in WordPress and bake those rules into the publishing script. Since you’re building with code (and a very smart AI to develop it), translating specific Notion styling into custom WordPress elements is straightforward.
Pro Tip: The gap between your Notion workspace and your publishing platform is almost certainly a solved engineering problem. Before you build a complex agentic workflow to bridge it, ask your AI coding assistant: “How can I programmatically publish from [your platform] to WordPress?” You’ll likely get a working solution in an afternoon.
Can AI Edit Your YouTube Videos?
The content pipeline doesn’t stop at blog posts. The same philosophy — break it into steps, automate the deterministic parts, use AI only where reasoning is needed — applies to video editing.
For simpler talking-head videos (no advanced effects), the editing pipeline works like this:
- Clip preparation — The creator reviews raw clips and removes outtakes. This is the one human step.
- Silence trimming + stitching — FFmpeg (a free command-line video tool) automatically trims silence from the beginning and end of each clip, then stitches them together. No AI needed.
- Audio cleanup — The audio track gets sent to 11 Labs for noise reduction and enhancement.
- Reassembly — The cleaned audio gets merged back with the video.
- Transcription — A local Whisper instance (OpenAI’s transcription engine, running on a Mac Mini) generates the transcript. Running locally means zero API costs.
- Description + chapters — The transcript gets paired with a YouTube description skill and sent to Claude, which generates timestamps, chapter markers, and the full video description.
- Upload — Everything gets automatically uploaded to YouTube.
The entire pipeline from raw clips to published video runs without human intervention after step 1. There’s nothing agentic about steps 2–5 — it’s pure code, completely free to run. The only token cost is step 6 (the Claude API call for the description).
The audio cleanup is the one area with the most room for improvement. 11 Labs’ API produces decent results, but it doesn’t quite match the quality of Adobe’s Podcast enhancer. The limitation? Adobe currently only offers a browser UI — no API. So until that changes (or a better alternative emerges), 11 Labs gets the job done.
What’s The Difference Between Offloading And Enabling?
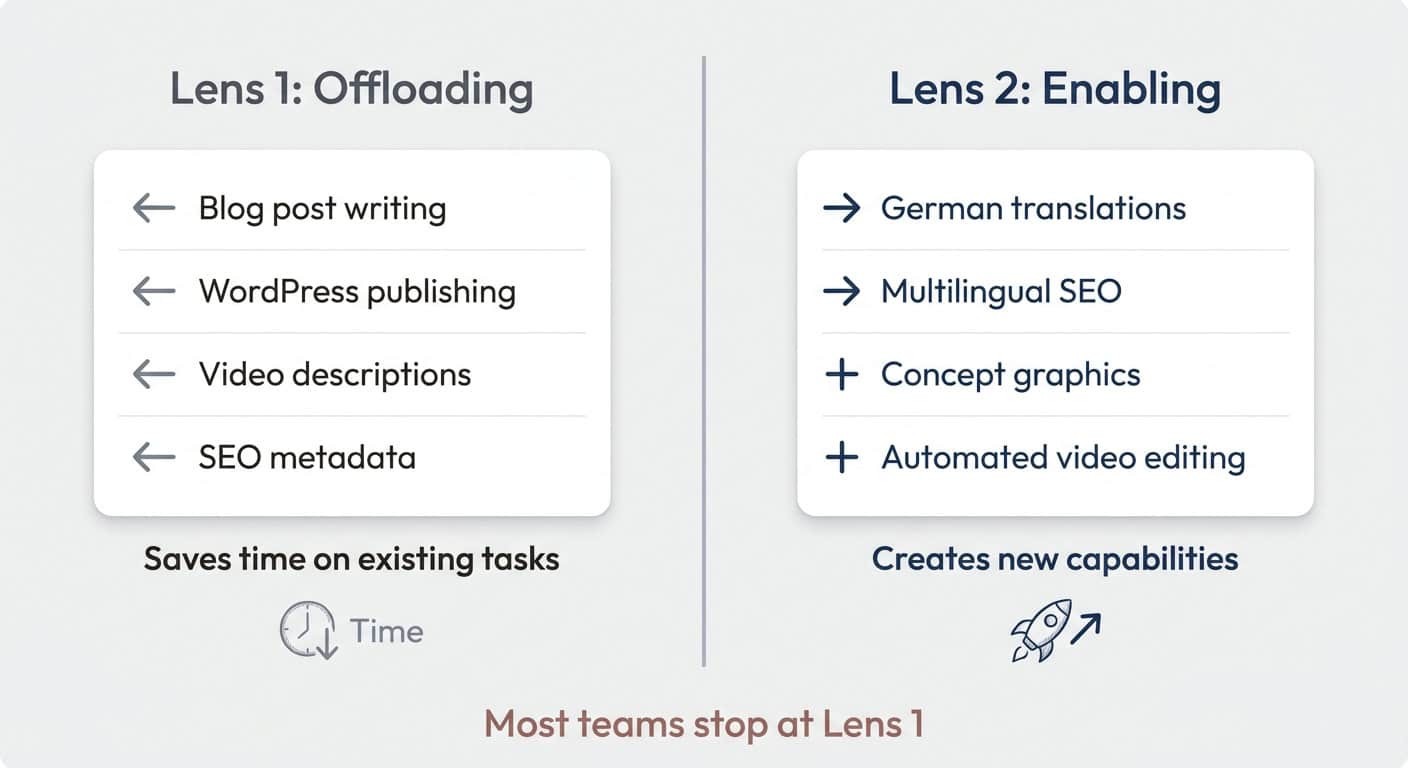
When you evaluate where AI fits into your workflow, there are two fundamentally different lenses to apply.
Lens 1: Offloading. What are you currently doing that you could hand to AI? Editing, description writing, blog post generation, WordPress publishing — all of these were manual tasks that now run autonomously. This is the most obvious use case: you’re doing the work today, and AI takes it off your plate.
Lens 2: Enabling. What couldn’t you do before because you lacked the resources? German translations are the clearest example. There was never a German blog post on the website — not because it wasn’t valuable, but because the time investment was never justifiable. AI didn’t just speed up an existing process. It created an entirely new output that didn’t exist before.
The second lens is where the real strategic value lives. Offloading saves time. Enabling creates new capabilities.
Both matter, but if you’re only looking through Lens 1, you’re leaving the bigger opportunity on the table.
Pro Tip: After mapping your current workflow for AI offloading, ask yourself one more question: “What would I do if I had an extra team member with no salary and infinite patience?” The answer usually reveals the enabling opportunities hiding in plain sight.
Frequently Asked Questions
How Much Time Does An AI Content Pipeline Actually Save?
For a YouTube-based content workflow, expect to save four or more hours per video once the pipeline is running. The biggest savings come from eliminating the blog post writing (roughly two hours), WordPress publishing and formatting (30 minutes to an hour), and the translation step (which previously didn’t happen at all). The editing pipeline adds another 30–60 minutes of saved time depending on video complexity.
Do You Need To Be A Developer To Build This?
No. The Notion-side pipeline — skills, custom agents, database triggers — requires zero code. The WordPress publishing step does require a script, but AI coding assistants like Claude Code can build it from a plain-English description of what you need. The video editing pipeline uses FFmpeg commands that AI can generate for you. The key skill isn’t programming — it’s being able to clearly describe what should happen at each step.
How Much Does Running A Multi-Agent Pipeline Cost?
Significantly less than running a single powerful agent for everything. The creative writing step (Opus) is the most expensive, but it only runs once per article. Every subsequent agent runs on Haiku at roughly 10x lower cost. In one real example, the link optimiser agent consumed just 181 credits across six to seven complete runs over several weeks. The video editing pipeline is essentially free — FFmpeg and local Whisper have no per-use cost.
What If Notion Doesn’t Have The Agent Tools I Need?
Build your pipeline with graceful degradation. If a step can’t complete — like image generation before the tool is available — design the agent to log what it planned, skip the step, and advance to the next stage. This way, the moment a capability ships, your pipeline is already wired up and ready to use it. You simply re-run the skipped step.
Can This Approach Work For Content Other Than YouTube Videos?
Absolutely. The four levels framework (ad hoc → projects → skills → pipelines) applies to any repeatable content workflow. Podcast show notes, newsletter drafts from meeting transcripts, case studies from client call recordings — the pattern is the same. Identify the transformation steps, create a skill for each one, then wire them together with status-based triggers.