Ever wondered what Crypto and Notion have in common? It’s the blockchain dilemma. In crypto, it’s a significant challenge to construct a blockchain that’s both scalable, secure, and decentralised. Similarly, in Notion, you can’t currently create a workspace that’s scalable, secure, and most importantly, has different Access Levels. However, when you’re running a business and managing different teams in Notion, it becomes crucial to implement proper Access Rights. Not every document should be accessible to every team. For instance, the Design team may require access to documents from the Product team but not to Management or financial documents. This is where having different levels of Access Rights in Notion becomes essential.
While Notion doesn’t provide a native solution for sharing specific parts of the database with certain users, there is a workaround to address this issue. In this post, you’ll learn:
- The best approach to building a Notion Workspace (and where it’s currently lacking)
- How to implement multi-level access rights in Notion
- When to explore alternative solutions for managing different access levels.
How to build a perfect Notion Workspace
One thing I’ve learned over the years of building Notion workspaces for my clients is to rely as much as possible on a Singular Database Structure. With this structure, every single document lives in one database, regardless of the users, departments, or teams.
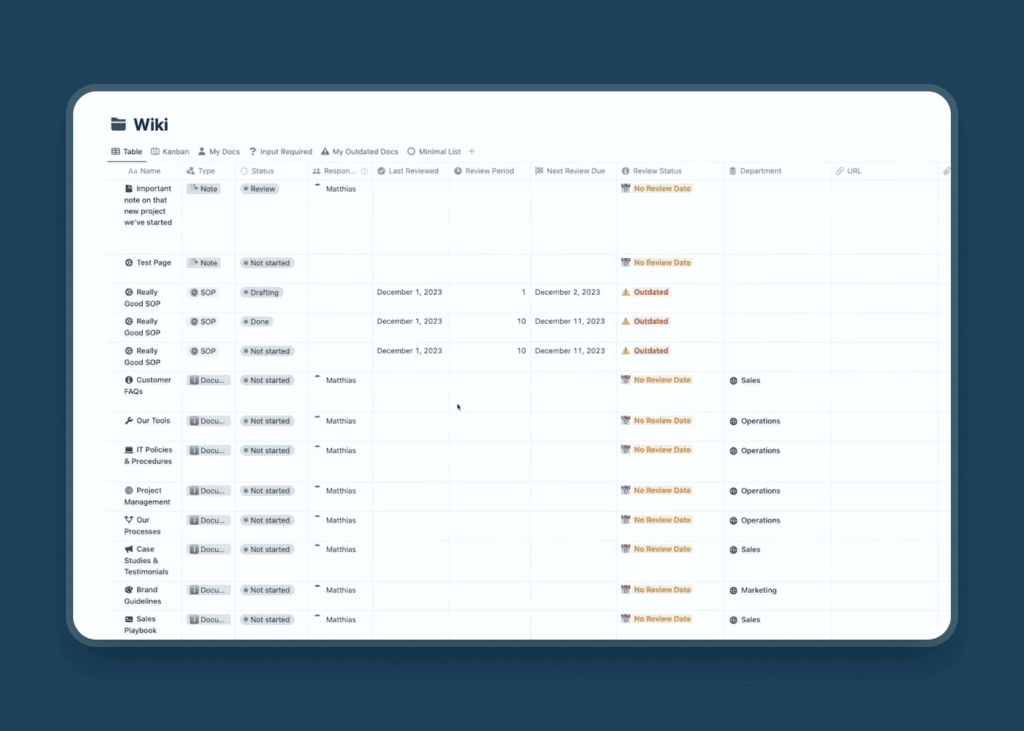
In my Notion Knowledge System, I implemented this single database structure to create a perfect Notion Company Wiki. Although there are multiple data types and departments to populate related items, all database items and documents, no matter who creates them and who is using them, come from one central database.
So, why bother with a Single Database Structure? Can’t you just create separate databases for different teams and departments? Of course, you can. However, having a single database structure comes with tons of benefits.
First of all, it helps to ensure that everything in your company’s Notion workspace has the exact same structure. Since the core database is the same, users from other departments can easily use the system without having to learn something new. Users from the marketing department can explore and use the Operations page easily. Everything looks the same.
A single database structure also enables you to move items from one department to another. So, when you need to transfer a project or document to a different department, you can do that instantly with a single click.
Furthermore, making changes in the Notion workspace will be much easier for you as you only have to deal with one single database. Otherwise, you would have to update multiple databases if you had different databases for different departments.
There is one more benefit of using this structure, probably the most useful one — the ability to pull related information across the workspace. Since all the documents and pages live inside one core database, you as a founder or manager can easily pull all essential information or documents into a single place.
Let’s say you want to look at all the outdated SOPs across the workspace. Since there is one core database, you can quickly find SOPs that are outdated or need improvement across all the departments in your company. This would certainly be a nightmare if you had to manage multiple team department wikis.
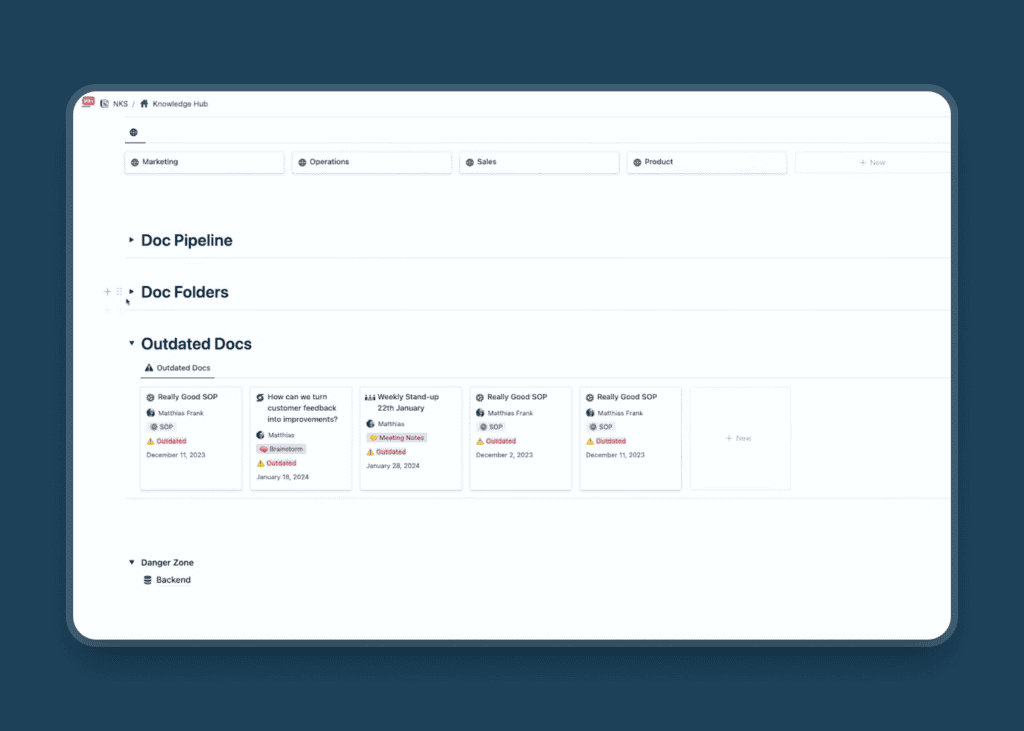
That’s all the good stuff. But there is a big caveat to this Single Database Structure — giving granular access rights in Notion. There is no native way, at least for now, to share parts of the Notion database with certain users or user groups. So, it’s impossible to make Marketing SOPs available only to the Marketing department plus some other people. Instead, users from all the departments will have access to the entire database.
Of course, you can change the share settings of the individual pages to give access to certain users or groups. However, this is not scalable at all and certainly not the ideal way if you have multiple teams in your company.
But that doesn’t mean you have to give up on the benefits of of using a Single Database Structure. You just need to know about a simple yet quite powerful workaround to this Access Rights issue. With this system, you can have multiple access rights in Notion and share certain parts of the Wiki database with your preferred users or user groups.
Sounds exciting? Here’s how to do it.
How to Get Multi-Level Access Rights in Notion?
As I’ve already mentioned, Notion doesn’t provide a direct option to customize access rights within a database. However, with the help of Notion database properties, formulas, automations, and a little bit of Notion Magic, you can set up granular access rights within a database. Then, you can control the access level for each department or team.
Before setting up the system, let’s quickly look at the high level process:
- You have a core database called Master Wiki.
- You have several, distributed databases according to your required access levels (i.e. Management, HR and Team All)
- Instead of creating every document in your Master Wiki database, you’ll create items in those distributed databases (so you can control access) and then have them automatically appear in the Master Wiki
This way, the Master wiki will contain all the documents or items from all other wikis, yet users from certain departments will only have access to the items meant for them.
Now let’s build the system from scratch.
Step 1: Creating the Master Wiki and Departmental Wikis
Go to a blank page and create one Master Database and multiple Department Databases (based on your needs). In this example, we’re going to use four different databases in total:
- Master Wiki (Core Database)
- Management Wiki
- HR Wiki
- Team Wiki
You can set up them as you like. A good starting point would be to have at least the following database properties in all your wikis:
- Name
- Responsible (Person Property)
- Status (Select or Status property)
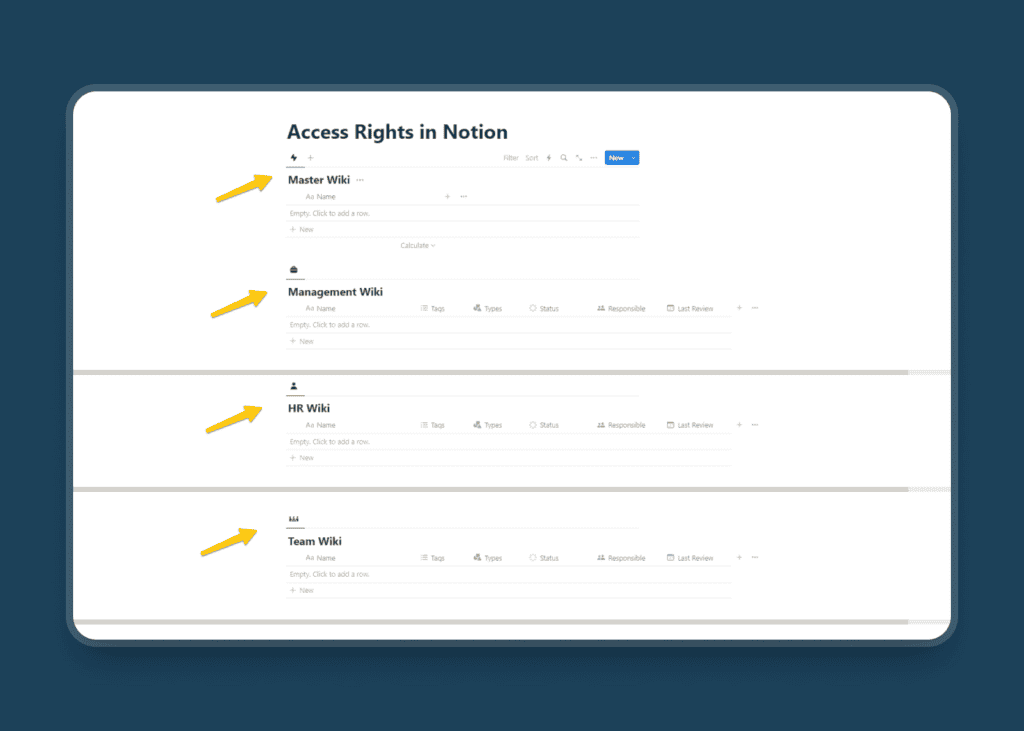
Now it’s time to connect your Master Database to each individual Department database. To do that, you need to create Relation properties to each departmental wiki. If you have 3 departmental wikis like in this example, you’ll need to create 3 Relation properties related to each departmental wiki. Make sure to turn on the “Show on …” toggle while setting them up.
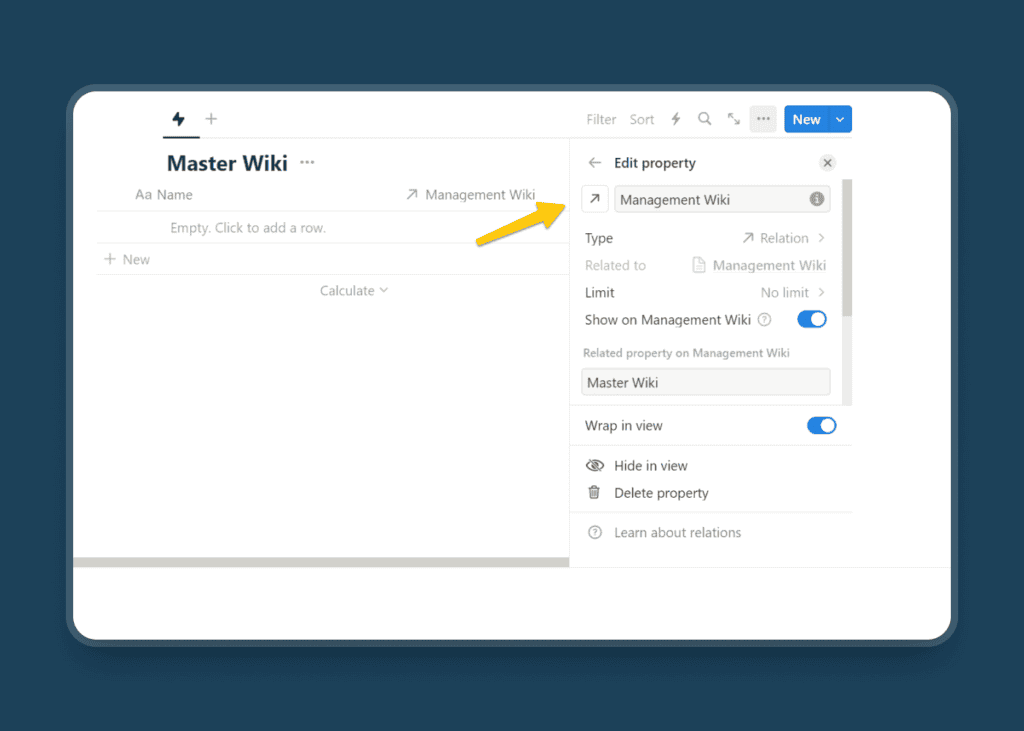
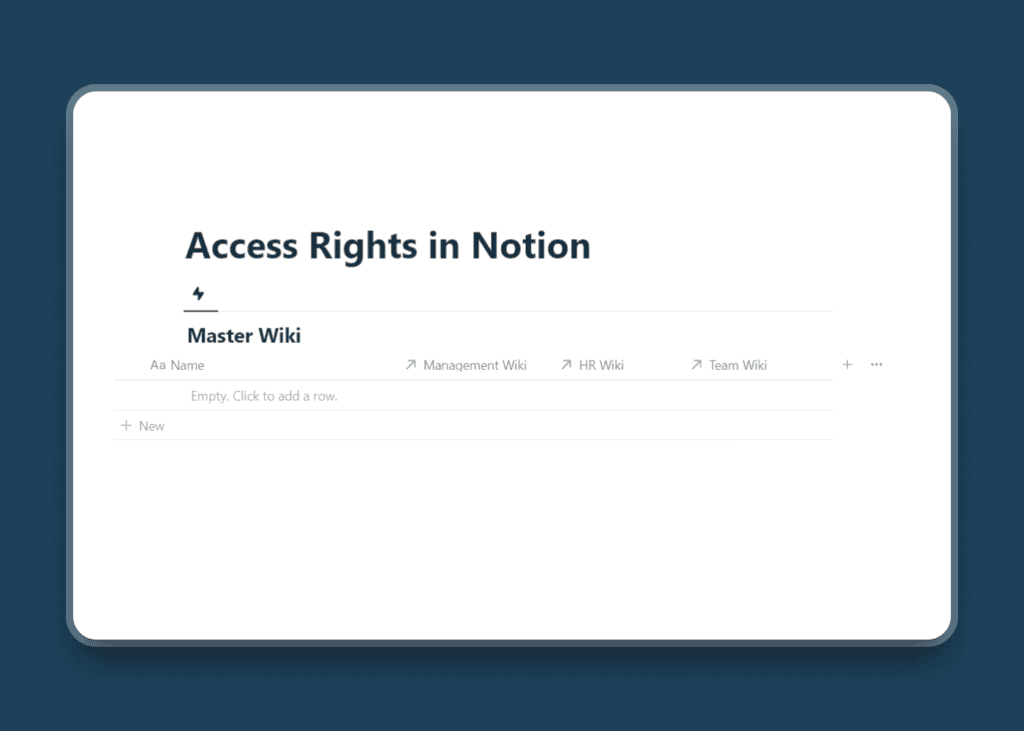
Once done, you should have Relation properties from the Master Wiki to the Management Wiki, HR Wiki, and Team Wiki.
Step 2: Setting up the Notion Automation
Now, you need to set up the Notion Automations for each departmental wiki. With this, you’re going to automate the process of creating pages in the Master wiki and adding relations to other wikis.
Notion automations are only available with the Paid plan, but you can use the Automations for free if it’s a template shared by other users. Scroll down to the bottom of the page to get this free Notion Company Wiki Template.
To set up the automations, first go to the Management Wiki. Click on the Automation (⚡) icon and set up the automation as follows:
Trigger:
- Page Added
Actions:
- Add page to: Master Wiki (Select the Master Wiki Database)
- Name: Management Entry.
Click on Edit another property and select Management Wiki (Relation Property).
- Management Wiki: This Page
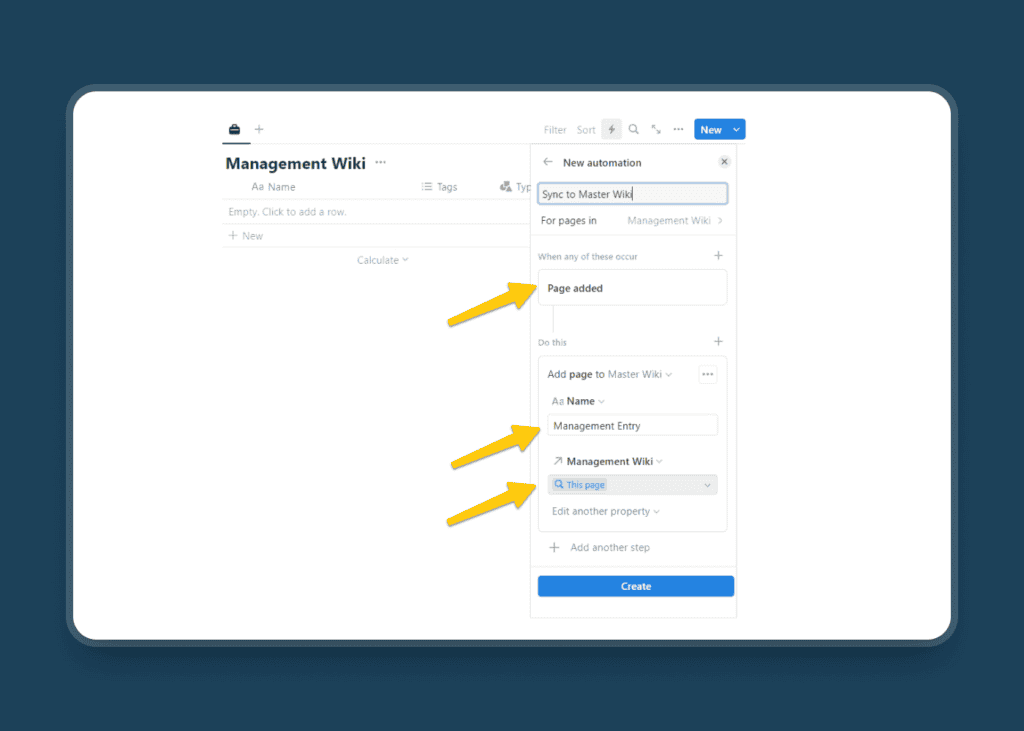
So, whenever you add a new page to the Management Wiki, it will create a new entry named Management Entry in the Master Wiki. Also, due to the relation property automation, the page in the Management wiki will be linked with the Management entry.
Once done, repeat these steps for every single distributed database. Each of them should have an automation to automatically add all new pages to your Master Wiki.
Step 3: Displaying the right wiki page using Notion Formulas
Although the pages from other wikis will be available in the Master wiki, users can’t access them directly by clicking on the Master wiki items because the pages are empty. So, instead of showing them the pages, you will display the linked pages using a Notion formula. This way, users have the option to click on the wiki pages and view its content.
To do that, create a new property in the Master wiki and select Formula. We can call it ‘Documents’. For the formula, use the following one:
ifs( Management Wiki , Management Wiki , HR Wiki , HR Wiki , Team Wiki , Team Wiki)
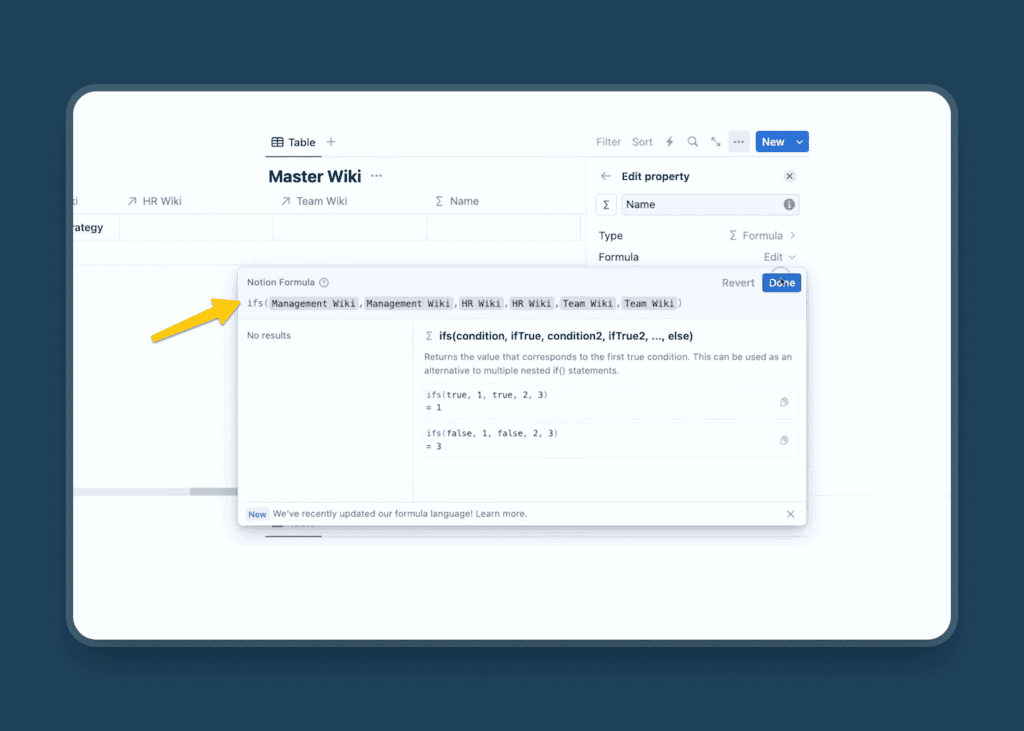
For each entry in the Master wiki, this formula iterates over all relations and finds the one entry that it’s connected to. That way, users can click on these pages to access the relevant documents.
If you have more department wikis, you’ll need to expand the formula accordingly. Similarly, if you have different names for your relations, you’ll need to update the formula to fit the names.
Now, every time you create a new page in any wiki, there will be a corresponding entry in the Master wiki with the page linked to it. All the documents across different wikis will be available in the Master wiki.
As the last step, you can now hide the relation properties from the Master wiki and only show the formula property that aggregates them.
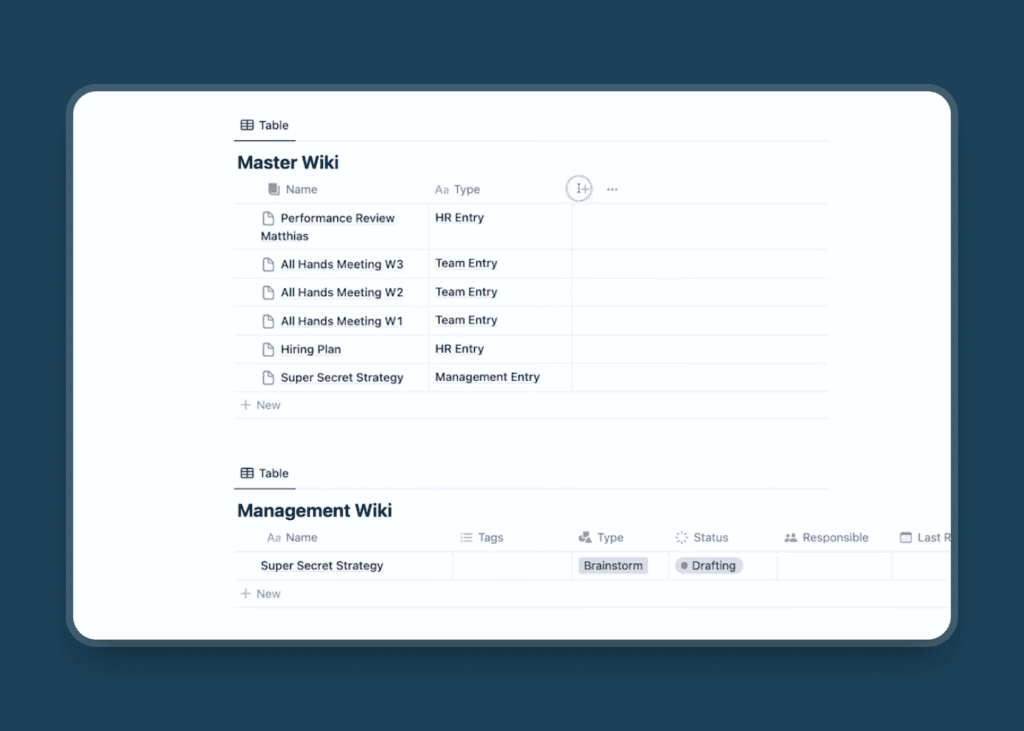
So far, you have created the system to gather all the pages into a singular database. What if you want to show the status of those pages? You can achieve that too using another Notion Formula. Just like before, create a new Formula property and use the following formula:
ifs( Management Wiki, Management Wiki. first(). Status , HR Wiki , HR Wiki. first(). Status, Team Wiki, Team Wiki.first().Status)
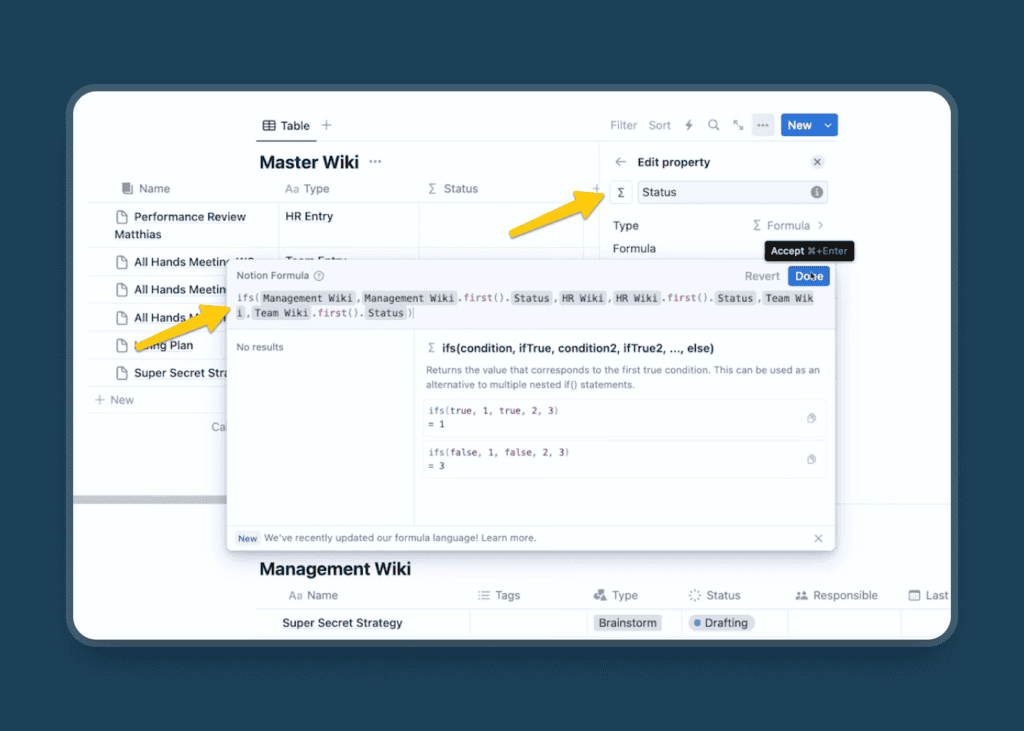
Now the status of those wiki pages will also be displayed in the Master Wiki.
They don’t have the exact same styling as a normal select or multi-select property, but you can get close by using the style() function. If you are a beginner in Notion Formula, check out this guide on Notion Formula 2.0.
In much the same way, you can now use this structure of a Notion formula to add other properties (pulled from other wikis) to the Master wiki. Whatever properties you have on them, aggregate them via formulas on the Master Wiki.
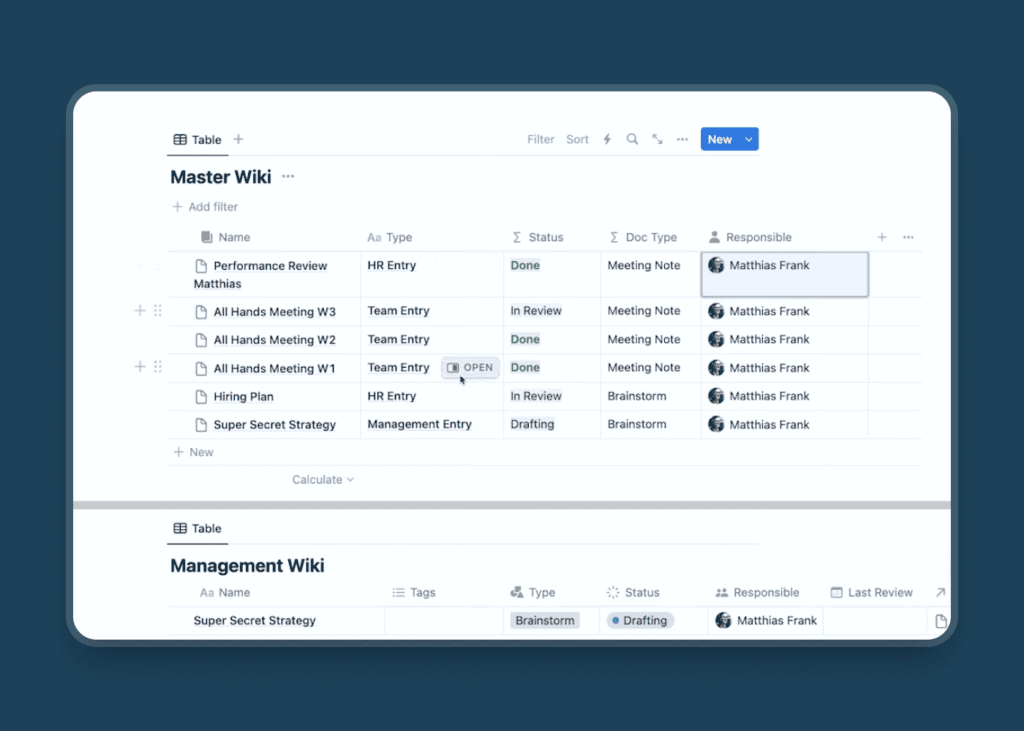
Step 4: Creating a Master Wiki template for easier access to documents
As you already know, the pages in the Master Wiki are actually empty. Users need to click on the linked pages (displayed using a Formula) to access the information. So, sometimes users can mistakenly click on the main pages instead of the linked ones.
To address this issue, you can create a page template for the Master Wiki and inside that, create a linked database to show the corresponding wiki page.
For this, go to the Master wiki, click on the dropdown icon beside New, and choose Create a new template. We can call it New Management Template (as it’s for entries that come from the Management Wiki).
In that template, add a Callout for the users that states ‘You’re looking at entry in the Master Wiki. To go to the actual document, please click on the document icon below ⤵️’.
Beneath that, create a linked version of the Management Wiki database.
For the filter, add an advanced filter and select “Master Wiki contains New Template”. This will ensure that only the relevant linked pages will be displayed here, giving users easy access to the relevant wiki pages.
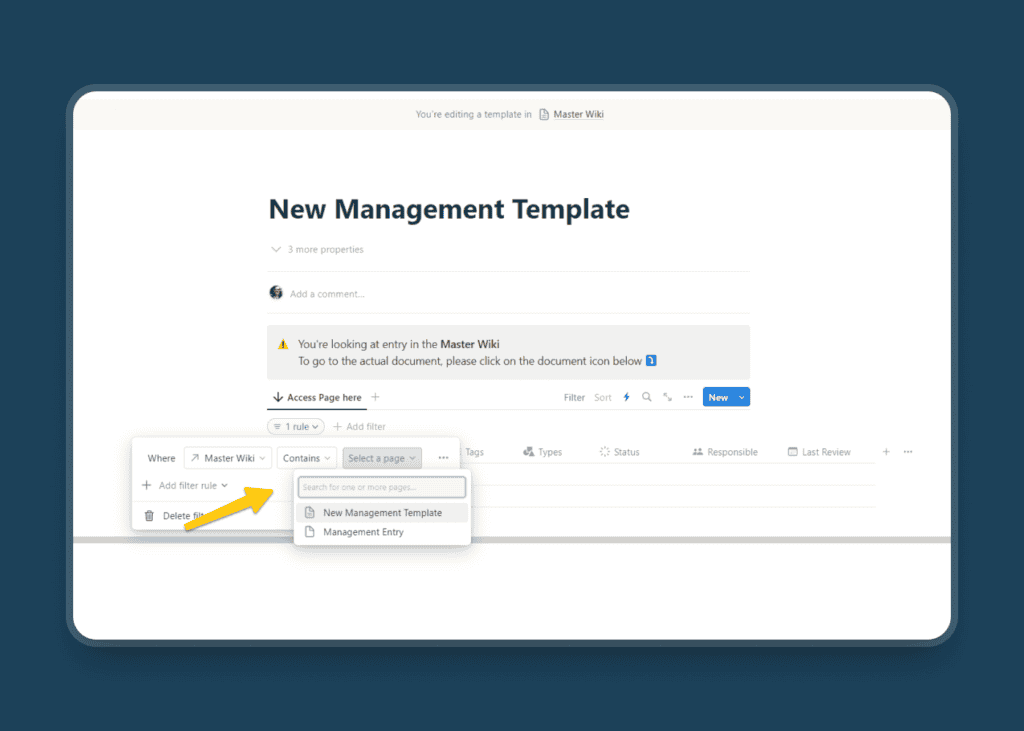
Then, go ahead and create templates for other other wikis too. Just remember to always link to the corresponding distributed wiki in the page body (so in the HR Template, link to the HR Wiki).
Step 5: Modifying the Share settings for each wiki
Now you can go back to the individual Wikis to set up the Share Settings.
- Share your Master Wiki with everyone on the team
- Share the individual databases only with the user groups that should have access to these kind of documents
With this setting, even in the Master Wiki, users will only have access to certain wiki pages to which they have access. Users who don’t have the necessary permission will only see the entry but won’t be able to click it or view the page.
Step 6: Creating the Workspace with new Master Wiki
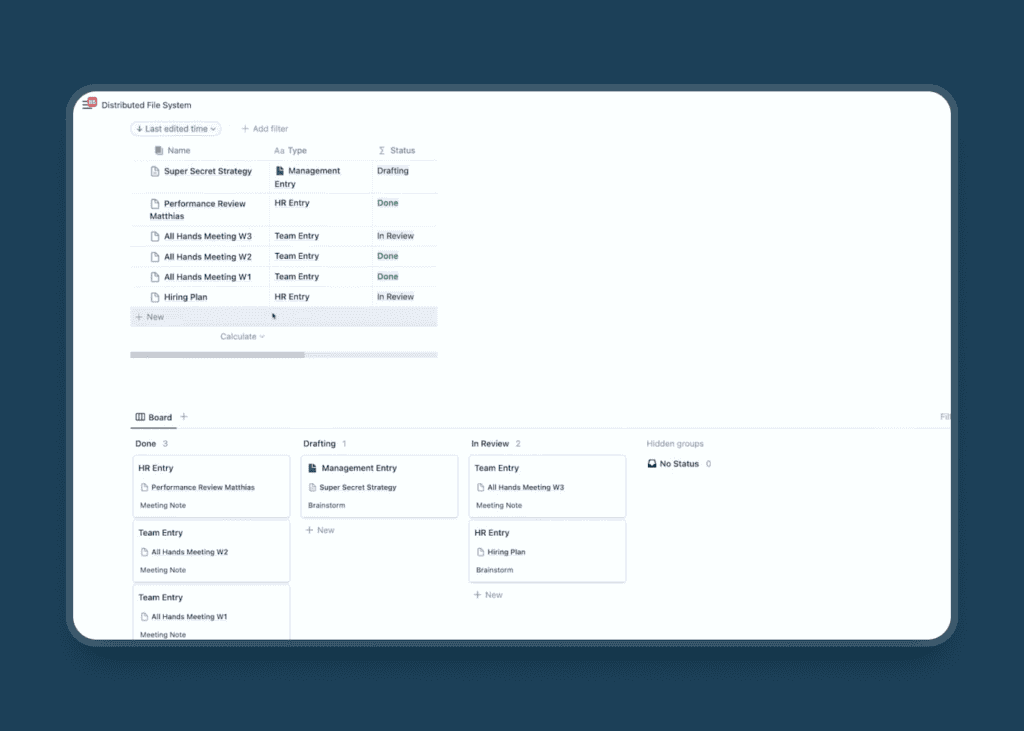
Voila! You have managed to create a Master wiki containing all the wiki pages across the workspace. Now it’s time to set up your workspace in any way you like. You can create multiple linked databases based on your needs and pull in any relevant pages using Filters. You can display the pages using Tables, Galleries, Boards, etc., leveraging the power of both the Single Database Structure and Granular Access Rights in Notion.
The Shortcomings of this System
While this workaround is currently a functional solution for this issue, it’s important to recognize its limitations and know when to seek other solutions.
Firstly, this approach to having different access rights in Notion works well if you have a limited number of access levels. For instance, if you have different groups like design, management, HR, and the rest of your team, this system will function effectively. However, if you have more than a handful of access levels, this system can quickly become complicated to manage.
Secondly, this approach requires you to maintain one hierarchy level of information. For instance, it works well for a Knowledge Management System where there are only documents and no hierarchical levels between them. However, it might not be as effective for a Project Management System where there are multiple hierarchy levels such as projects, tasks, and perhaps sub-tasks. Managing such a system under this approach could become extremely challenging.
Despite these shortcomings, until Notion develops a native solution to this issue, this approach can be a real game-changer. So, give it a try and see if it fits your needs!
Get Your Free Notion Template
You can download this Notion Template plus another 21+ other free templates here:


