If you’ve ever opened Notion and thought, “This is nice… but why is my company still in chaos?”, there’s a good chance you haven’t discovered the real secret yet: databases.
Learning how to create a database in Notion is like discovering a hidden feature in your favourite video game.
Suddenly, everything makes sense. Your tasks behave. Your content plans stop screaming for help. Your client work stops living inside eight different tools that all hate each other.
In my simple tutorial, I’ll walk you through how to make a database in Notion, customise it, and use it in a way that saves you time, reduces mental clutter, and generally makes you feel like the organised adult you keep promising your future self you’ll become.
Let’s get into it.
Key Takeaways
✅ A database in Notion is structured information that you can sort, filter, and view in different layouts.
✅ If something needs order, has a status, is otherwise organised in lists or excel sheets, it belongs in a database.
✅ You’ll learn how to create a database in Notion step by step (it’s easier than assembling IKEA furniture).
✅ You’ll understand the 6 main database views and when to use each one.
✅ You’ll get examples, free templates, and customisation ideas.
✅ You’ll walk away with a workspace that feels cleaner, calmer, and 200 per cent less chaotic.
What Is a Database in Notion?
Databases save lives. Seriously.
🌍 Real-world insights: Studies show that databases leveraging Electronic Health Record (EHR) made it possible to achieve a 30% rise in revenue, a 10% rise in clinical percentage, a 25% rise in treatment plan completion, and a 20% rise in case rate eligibility in just 3 months.
A database in Notion is simply a structured table where each row is an item, and each item can open as its own page. As they explain on their website:
“Databases are collections of Notion pages that help you organize information in a variety of ways. With multiple database views to choose from, you control how to display and search your content.”
So, in other words, it’s Notion’s way of saying: “Let’s stop making you scroll through five million notes and give you something you can actually manage.”Importantly, Notion databases are continually developed and improved to enhance your convenience and efficiency. Take a look at my video on the recent updates:

A database:
- Stores information in properties (like date, tags, people, files, etc.)
- Can show your data in different views like tables, calendars, boards, and galleries
- Keeps everything connected across your workspace
- Helps your team become incredibly organised, even if you’re all held together by caffeine and vibes
Common uses include:
- Task management
- Content calendars
- Habit trackers
- Knowledge bases
- CRM pipelines
- Team collaboration
💡 Pro Tip: Think of databases as the backbone of your Notion workspace. Without them, everything becomes a very pretty pile of chaos.In fact, one of the very first things that we do whenever we work with a new client is figuring out the perfect database architecture for their day-to-day business
How to Create a Database in Notion
Time to build the magic 🧙
Step 1: Open a New or Existing Page
Start wherever you want your database to live.
Step 2: Add And Name Your Database
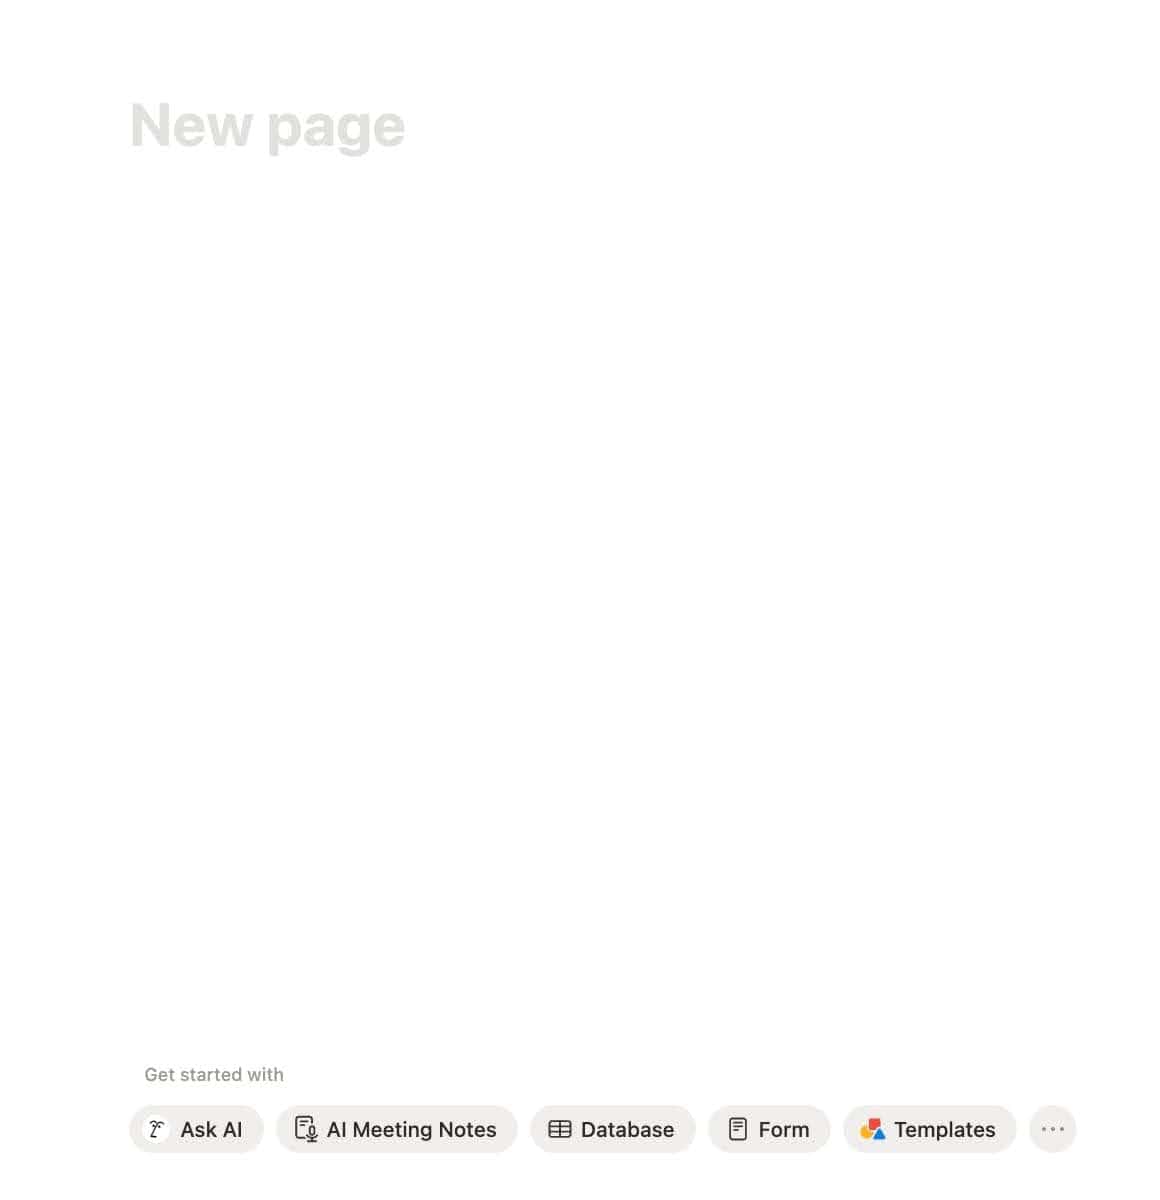
Click on the page and type /database.
Choose Database – Inline to get something small and tidy on your page.
Now, here is the part most beginners overlook.
Inline databases are great for quick setup, but they are not where you want to stay for long.
If you are building a workspace that will eventually scale, you will almost always want your main databases to live as full-page databases. About 90 percent of the time, this setup keeps everything cleaner, easier to organise, and far more reliable as your system grows.
Why? Because full-page databases make it simple to separate two things that should never be mixed up:
- the data (your actual databases)
- the doing (your dashboards that use linked database views)
Inline is perfect when you are starting out, and that is what you will see in most of my tutorials. It helps you learn the mechanics without jumping between pages too early.
But later, once your structure starts taking shape, you will want to move those inline starters into a dedicated location in your workspace.
That shift is what turns a simple Notion setup into a scalable system, and it is exactly what I teach in my project management tutorials.
If you want to see this concept in action, here is a walkthrough where I show how I separate backend databases from clean, focused dashboards:

So in short:
- Start with an inline database.
- Learn the basics.
- Then upgrade it to a full-page home in your backend.
- Use linked views on your dashboards to surface only what you need.
This one habit will save you hours of chaos later, especially as your workspace grows across teams and departments.
Name it something sensible, not “things I should probably do sometime maybe”.
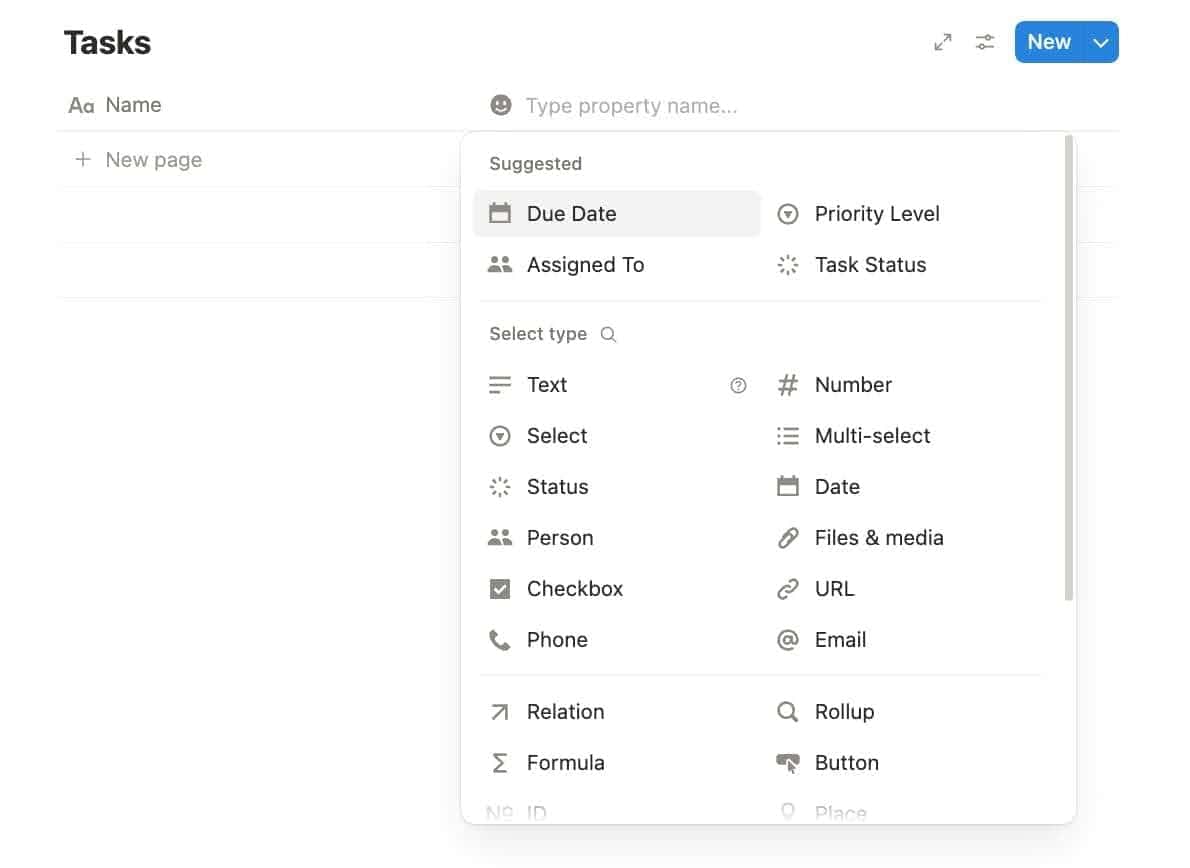
Step 3: Customise Your Properties (Columns)
Before you start clicking around, take a moment to think about two simple questions:
1. What is it?
This is essentially the name of your database.
You might be storing tasks, content pieces, leads, habits or anything else you want to track.
2. What do I need to know about it?
Your answers here turn into properties.
If you are storing tasks, you might care about:
- when it is due
- the status
- who is responsible
- which project it belongs to
If you are storing content ideas, you might track:
- the stage
- the type
- the target publish date
- the platform
This quick brainstorming exercise saves you a lot of frustration later. It makes sure your database reflects the actual work you do, instead of becoming a dumping ground for random fields.
And here is a pitfall I see all the time when people start using Notion.
Because you can organise everything, you might feel tempted to… well… organise everything.
The result? A database with 25 properties, of which you fill out maybe three. The rest just collects dust and makes your workspace harder to use.
A good rule of thumb: Only add properties that you will realistically maintain and that help you do your work. Everything else is noise.
Once you know what matters, you can start setting up the right types of properties.
Your most important options are:
- Text
- Select
- Multi select
- Date
- People
- Files
- Relation
- Rollup
💡 Pro Tip: If you plan to sync data into Notion through automation tools like Make, set your property types correctly now. Dates should be Date, labels should be Select, lists should be Multi select, and so on. This tiny detail makes integrations far more reliable.
👉 My guide on sending data to Notion walks you through this in a simple, visual way.
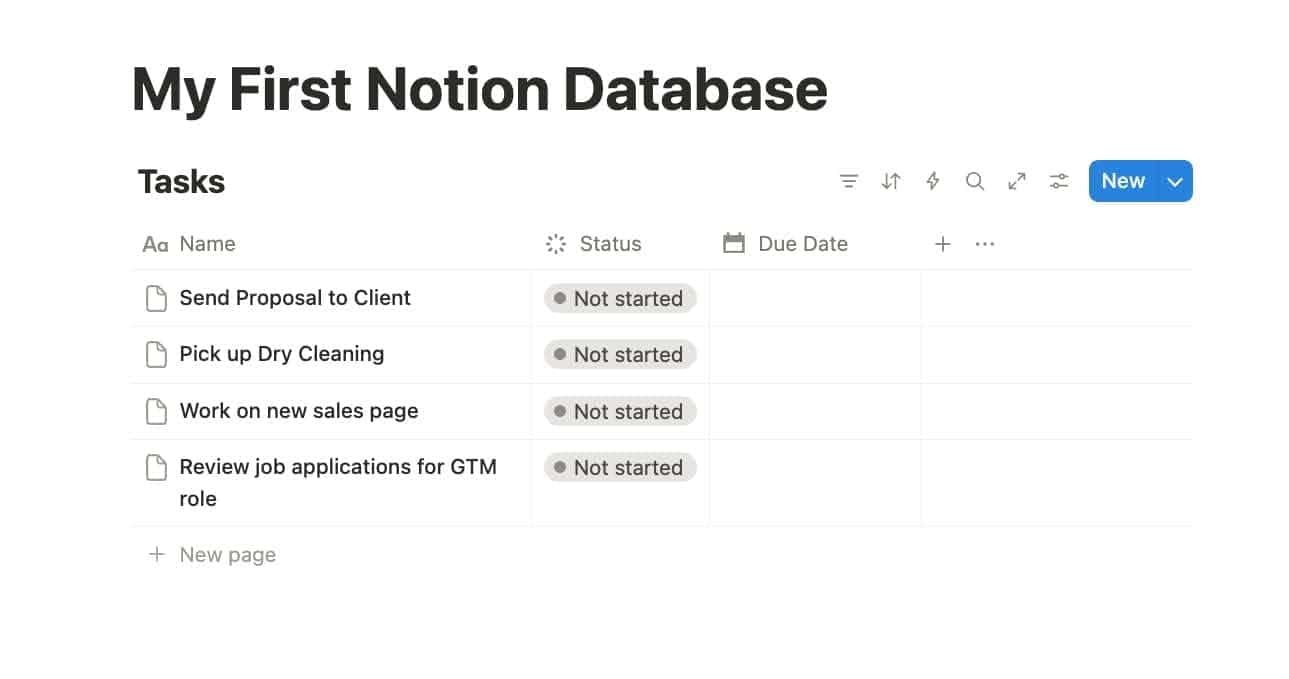
Step 4: Add Your Data
Start entering your items. Treat each one like a tiny digital pet. Feed it with all the information it deserves.
Step 5: Filter, Sort, and Group
This is where Notion begins to give you productivity superpowers.
- Filter: show only what’s relevant
- Sort: organise by deadline, priority, or alphabetical chaos
- Group: stack items by status, person, category, or anything else

A well-filtered database will remove at least one “what am I supposed to do today” crisis per week. Trust me.
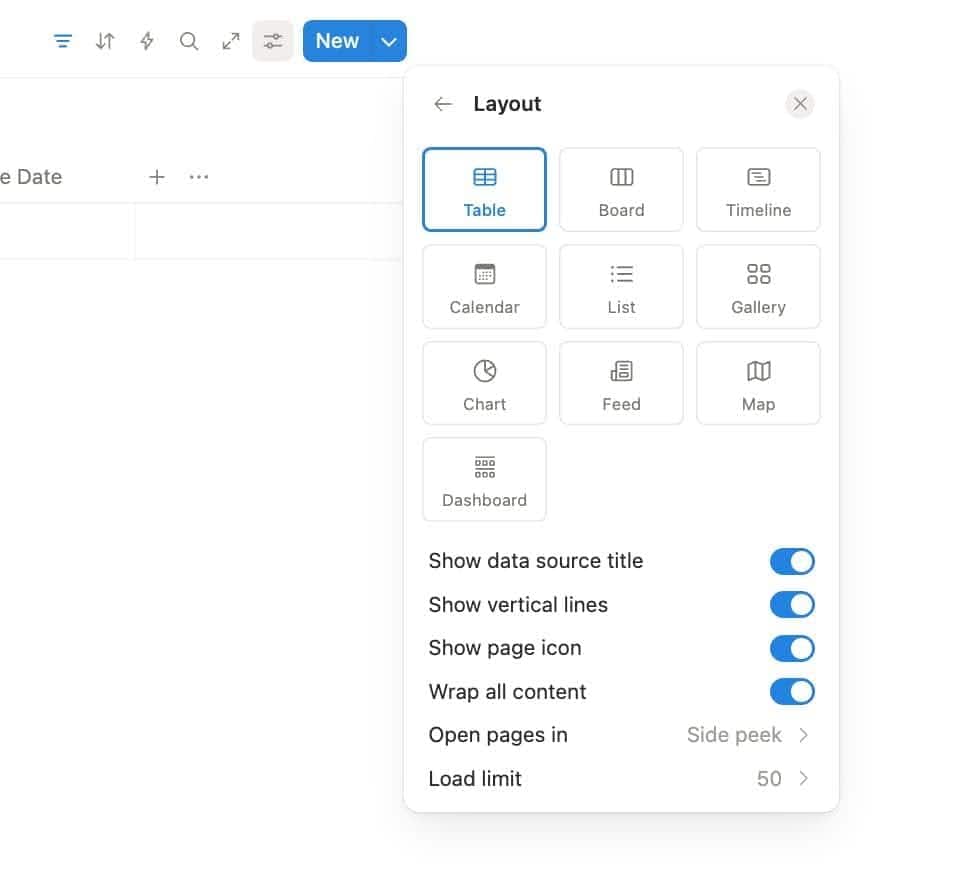
Step 6: Create Multiple Views
The same data, different perspectives.
- Table: for detail nerds
- Board: for visual thinkers
- Calendar: for deadline lovers
- Gallery: for creative minds
- Timeline: for plotting world domination (or roadmaps)
Your Next Steps
Once your database is set up, this is the moment to actually start working with it.
Try adding a few real items so you can see how your structure behaves.
Adjust your properties, tweak your filters, test different views and reshape anything that does not quite feel right.
Your first version is never the final version, and that is completely normal in Notion.
If you are working with a team, this is also the point where you should make sure everyone has the right level of access.
Permissions in Notion can get a bit complex, so instead of covering them here, I have put together a dedicated guide that walks you through how to share only what you want people to see.
Start small, refine as you go and let the database evolve alongside your workflow.
That is how you build a system that feels natural instead of overwhelming. Watch my video here to see it in action:

Types of Databases in Notion
Let’s explore the six main views.
Each view is a different way of seeing the same data, much like switching camera modes on your phone until you finally find the one that produces a picture that looks amazing.
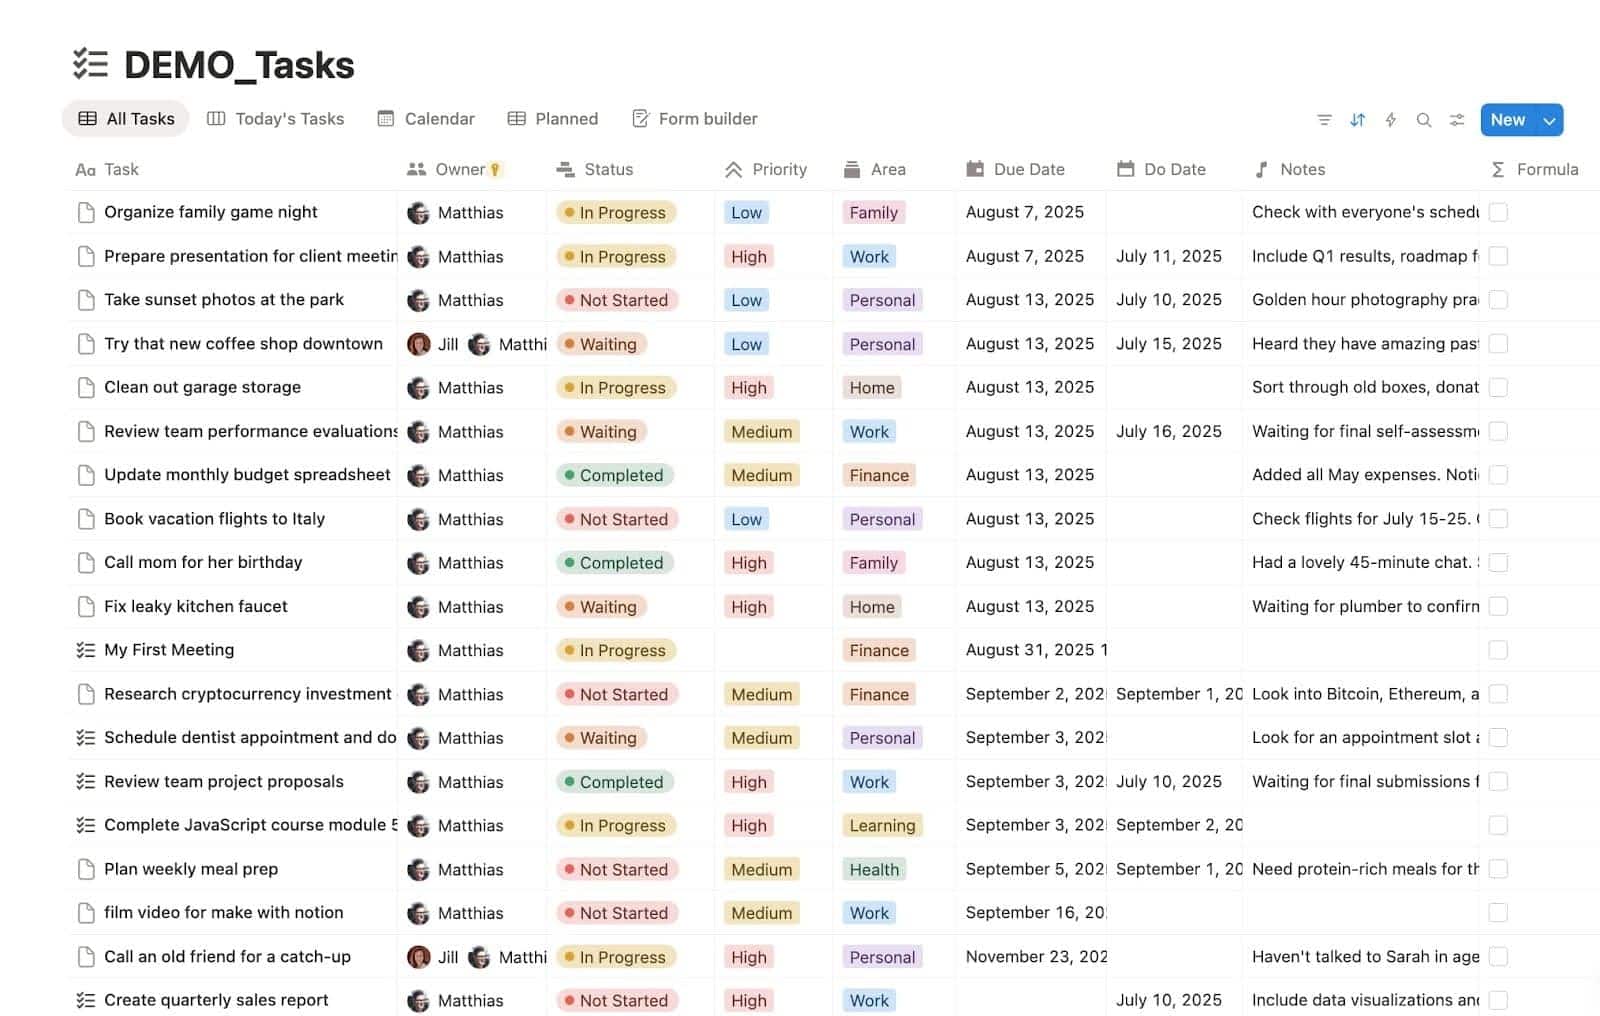
📊 Table View
Perfect for when you want all the details at your fingertips. You see rows and columns, similar to a spreadsheet.
Use it for:
- Project planning
- Task lists
- Inventory
- Knowledge bases
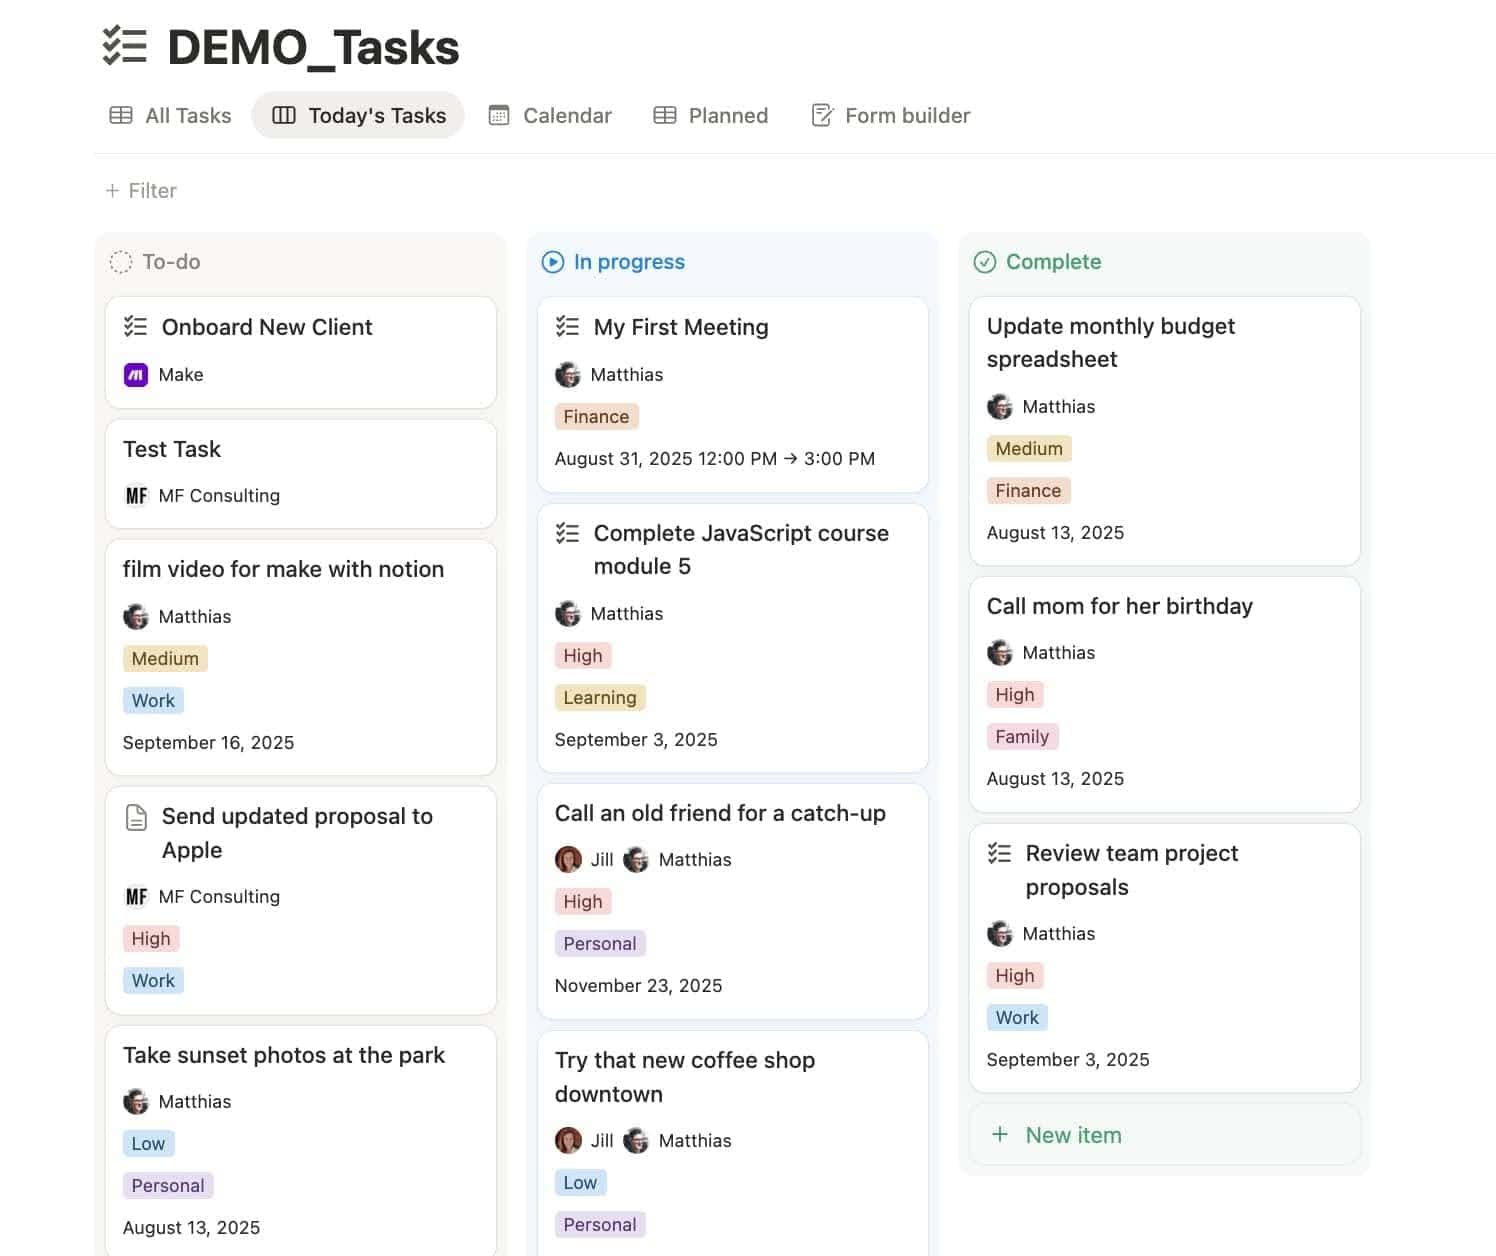
🗂️ Board View (Kanban Style)
A visual drag-and-drop dream. Excellent when you want to see progress visually.
Use it for:
- Pipelines
- Sprints
- Content stages
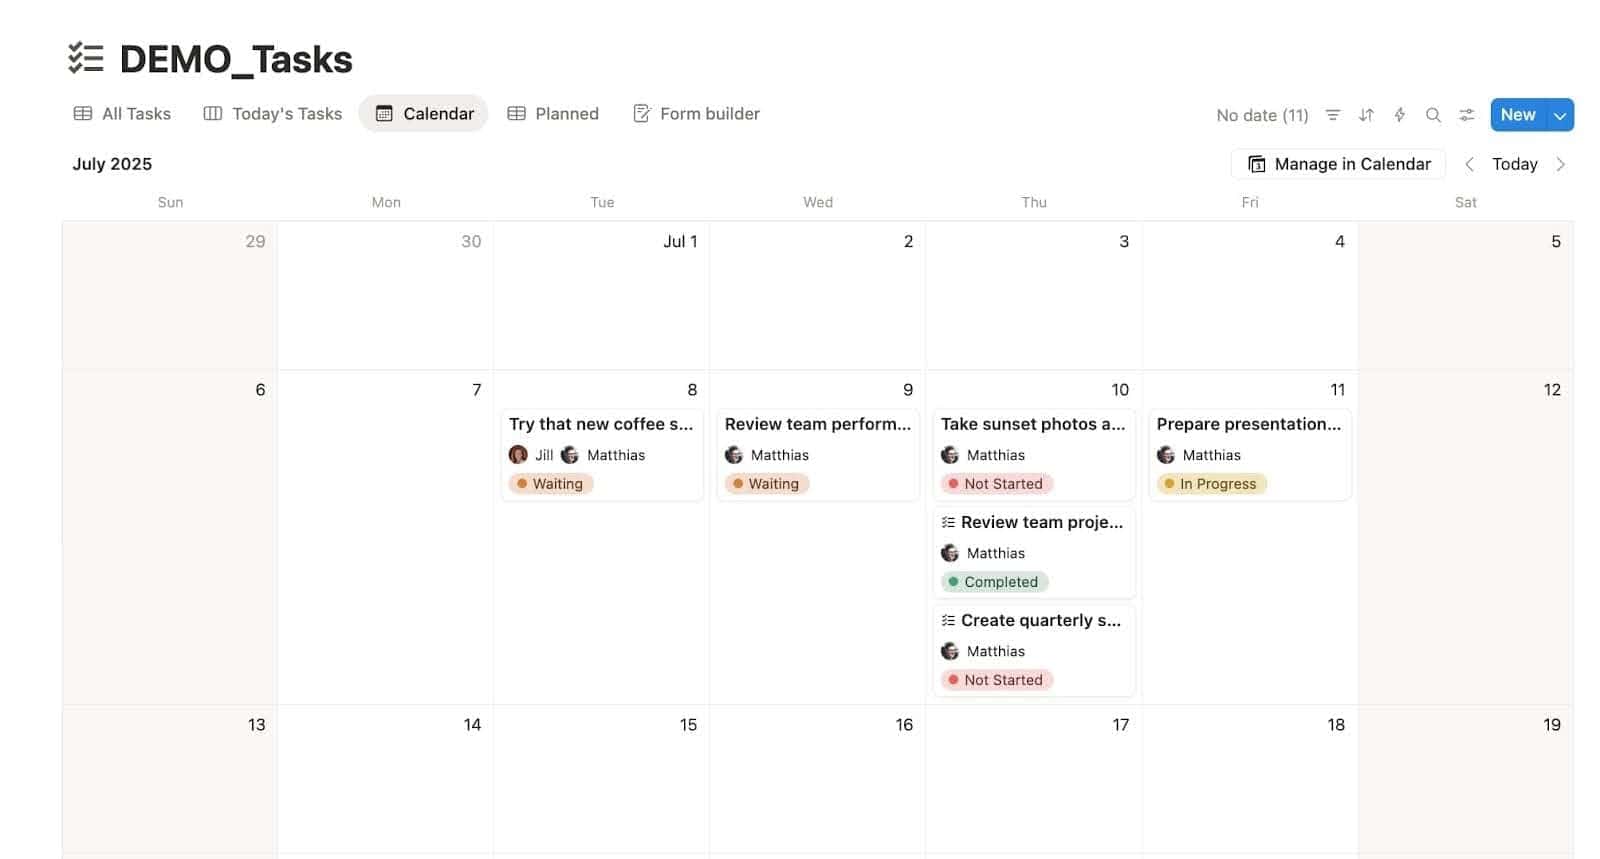
📅 Calendar View
All your deadlines in one place. Whether you love deadlines or fear them, they’ll be waiting here.
Use it for:
- Editorial calendars
- Task deadlines
- Event planning
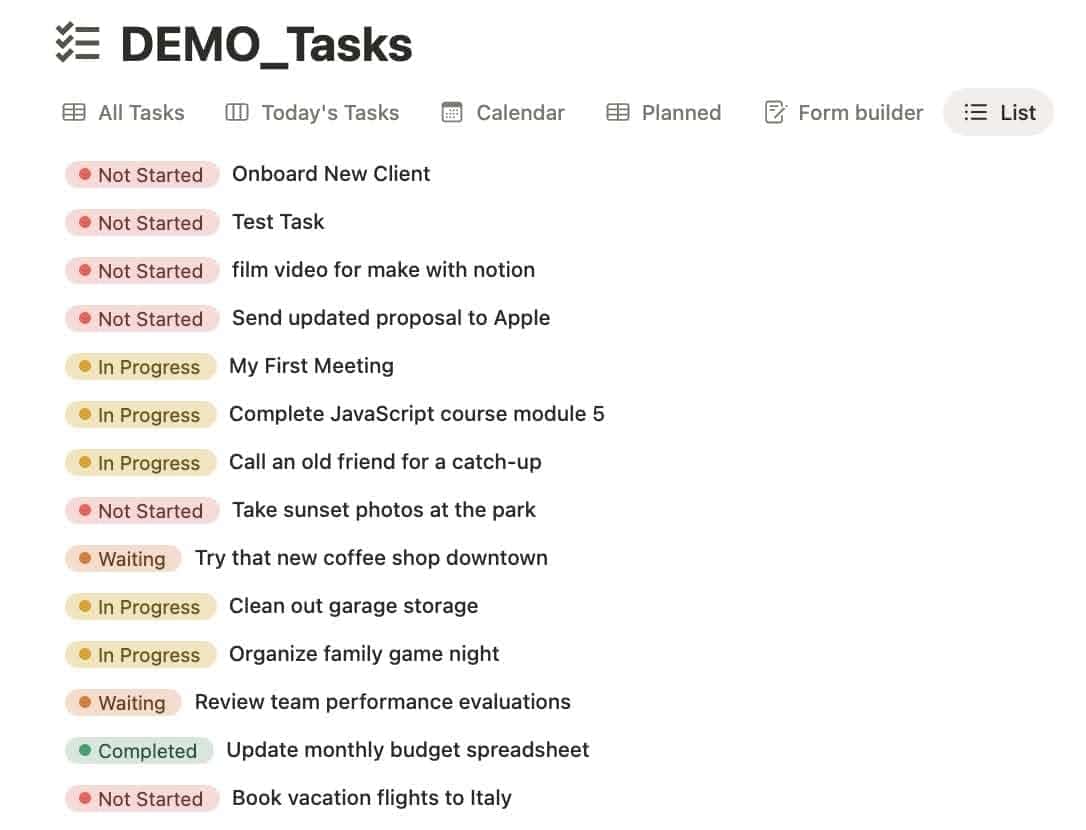
📋 List View
Minimal, lightweight, and perfect for simple overviews. Cleaner than a table but more structured than a checklist.
Use it for:
- Simple task lists
- Minimalist planners
- Feature requests lists
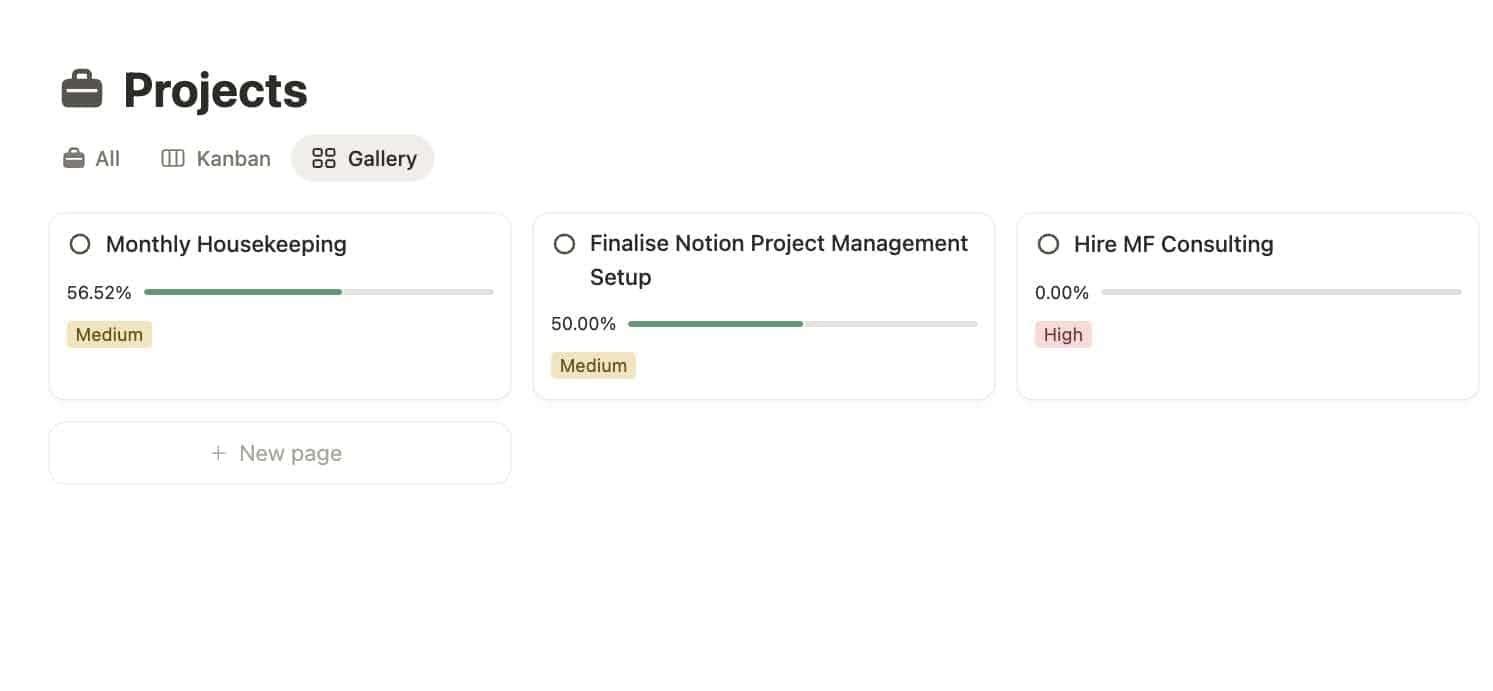
🖼️ Gallery View
Visually driven and excellent for creative work. For when you want your ideas to look pretty.
Use it for:
- Idea banks
- Templates
- Design references
- Team directories
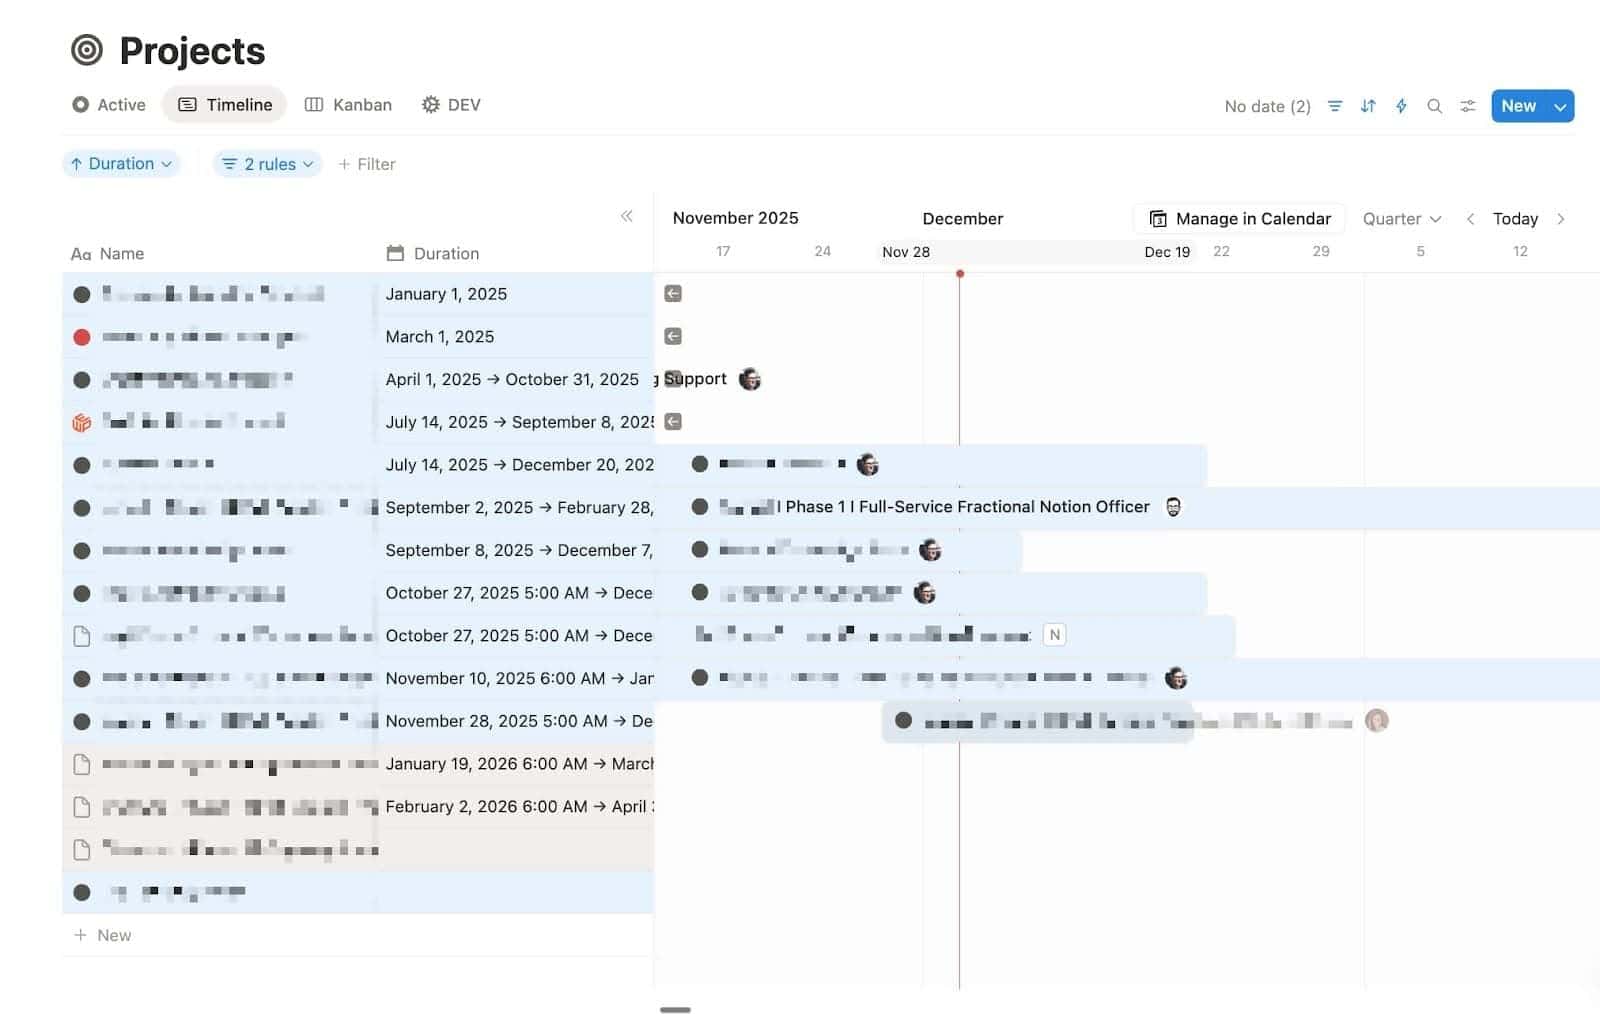
🕒 Timeline View
Brilliant for complex project planning. If Gantt charts are your love language, welcome home.
Use it for:
- Gantt charts
- Roadmaps
- Multi-team projects
- Anything time-based
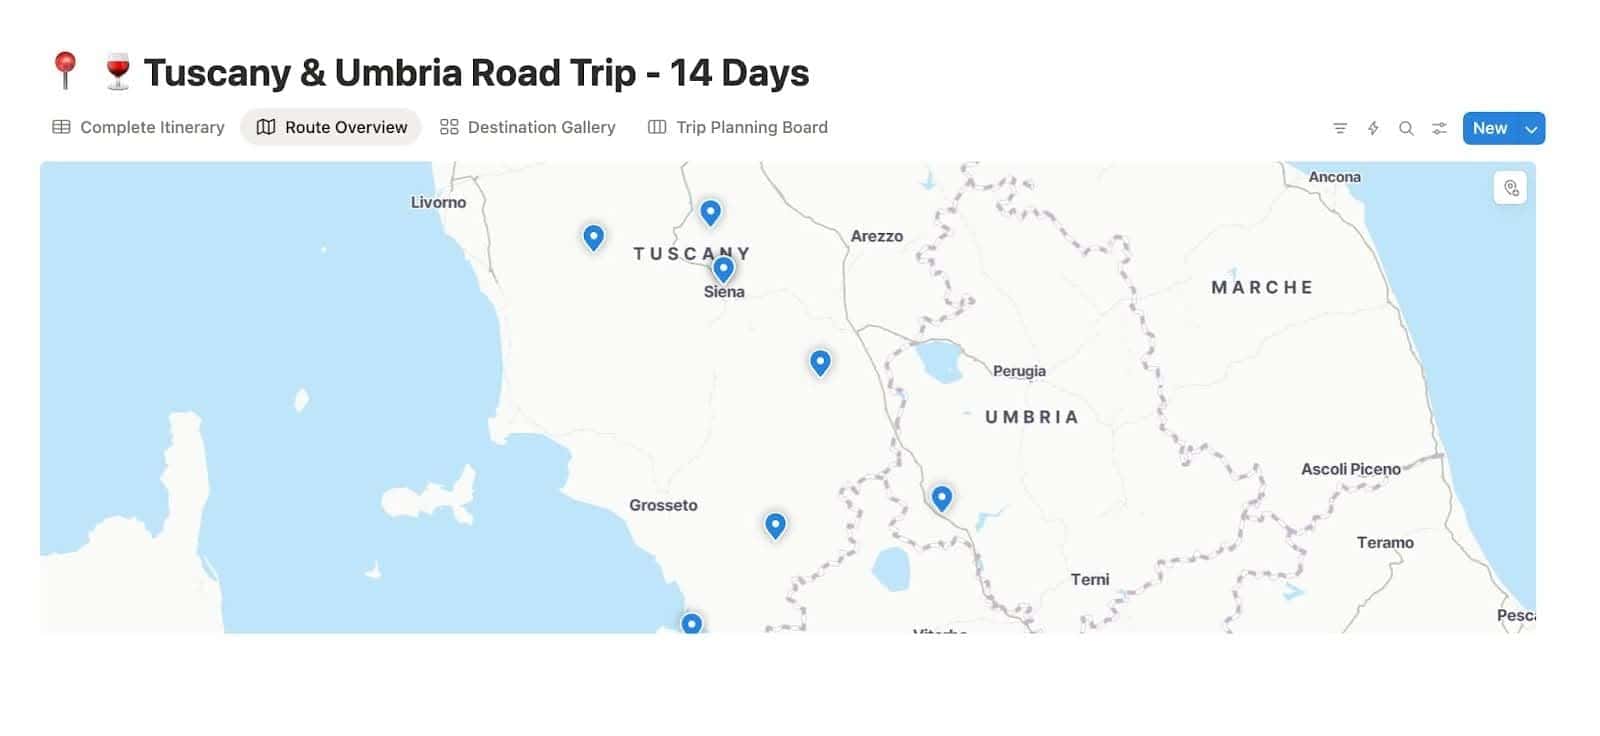
🕒 Map View
Adding a map view to your database unlocks a brand-new type of location property.
It works a bit like Google Maps. You can search for a place right inside Notion, save it to your item, and once you switch on the map view, Notion will drop it in as a pin on an interactive map.
It is simple, visual and very intuitive once you see it in action.
7 Ways to Customise Your Notion Database
Give your workspace a makeover that feels polished, personal, and actually enjoyable to use.
1. Add and Rearrange Properties
Drag properties left and right to change the layout.
Keep the most important information at the top.
Move them around until your brain says, “Yes, that’s the order”.
💡 Pro Tip: You can right-click on any column to freeze the database view up to that point.
This is incredibly helpful when your database has more properties than comfortably fit on the page. A frozen column stays fixed in place while the rest of the properties scroll, which means you can always keep key information visible.
For example, you can keep the task name locked on the left, even when you are scrolling through a long list of additional details.
It keeps your database readable, no matter how wide it grows.
2. Use Filters and Sorts to Control Visibility
Don’t let overdue tasks haunt you at 2 AM. Filter as much as you need.
The available filters include:
- Only tasks assigned to you
- Only items due this week
- Only ideas marked “Approved”
3. Create Relations Between Databases
Relations let you link information across your workspace.
For example:
- Connect tasks to projects
- Connect content drafts to products
- Connect clients to meetings
Suddenly, everything updates itself like magic.
4. Use Rollups for Smart Summaries
Rollups are one of those features that look tiny at first, but unlock a surprising amount of power once you understand how they work.
A rollup lets you pull information from a related entry.
So if your task is linked to a project, you can use a rollup to show the project’s status directly on the task. No jumping between pages, no extra clicks.
Rollups also shine when several items are connected to the same entry.
If a project has six tasks linked to it, you can use a rollup to count how many of those tasks are still open, create totals, or show the latest update.
Some practical examples:
- Total tasks per project
- Latest meeting notes per client
- Number of open tasks
- Total revenue per deal
Once you start using rollups, your databases begin to feel more like a living system that updates itself rather than something you constantly have to maintain manually.
5. Group Items for Quick Insight
Grouping ensures you can understand context at a glance.
You can group by:
- Status
- Team member
- Priority
This is great for:
- Status-based workflows
- Team assignments
- Weekly planning
6. Add Colour Coding
Colour is not just decoration.
It helps you see your system faster – keep an eye out for a new post dedicated to conditional colour coming soon.
7. Hide Properties You Don’t Need
One of the biggest advantages of Notion databases is that you never have to look at everything all at once.
Unlike a traditional spreadsheet, where every column is always visible, each view in Notion can show only the properties you actually need in that moment. Everything else can stay hidden in the background until you need it again.
This keeps visual noise low and helps you focus on the task in front of you.
Think of it like this:
- You want to see what you need to do today.
Hide everything except your open tasks with a due date of today. - You want to understand how your team is progressing on a project.
Show all tasks linked to that project, regardless of who is assigned or what the status is, so you get the full picture at a glance.
You can reveal hidden properties anytime, so there is no risk in keeping your views clean and lightweight.
This flexibility is one of the true superpowers of Notion databases.
Examples of Databases You Can Create in Notion
Want inspiration? Here are a few different Notion setups for your inspiration. Inspiration you can use to build out your own systems. Each of these can be a practical starting point for building your own systems.
Task Manager
A clean, simple task manager that helps you actually get things done.
👉 Free Notion Task Manager Template
Content Calendar
A complete system for planning, drafting, and publishing content. Perfect for anyone who has ever said, “I’ll post tomorrow”.
👉 Free Notion Content Calendar Template
Habit Tracker
Track your daily habits with minimal friction.
Gentle accountability. No judgment.
👉 Free Notion Habit Tracker Template
Goal Tracker
Stay consistent with long-term goals.
Plan your year without crying.
👉 Free Notion Goal Tracker Template
Best Practices for Using Databases in Notion
These tips will keep your workspace smooth and your sanity intact.
Keep Naming Consistent
Nothing slows teams down like someone naming a property “progress checker version 3”. Call it “Status”. Please.
Use Templates to Save Time
Every item you create should start with a clean, consistent structure. Notion database templates let you create consistent pages with just a few clicks.
Minimise Clutter
Use filters, toggles, and archived views. If you don’t need it daily, hide it. Your brain will thank you.
Use Relations and Rollups Wisely
Linking information keeps your workspace scalable and prevents duplication. It also typically impresses your team, which is always cool.
Golden Rule: Use Single Global Databases
Nothing clutters a workspace faster than having three different task databases floating around.
This is one of the most common beginner mistakes. Most of us come from tools like Google Sheets, where you simply create a new list every time you start a new project.
In Notion, that approach works against you.
Instead, you should have one database per type of information you want to organise – one for tasks, one for projects, one for content, one for clients and so on.
From there, you use views, filters and sorts to display only what is relevant at the moment, such as the tasks for a specific project or the content scheduled for this week.
This is also something I pay close attention to when auditing a new client’s workspace.
Consolidating scattered lists into clear, global databases is often the first step toward creating a system that is easier to scale, easier to automate and far less stressful to maintain.
Final Thoughts: Mastering Databases in Notion
Once you learn how to create and customise databases in Notion, everything changes.
✅ Your systems get cleaner.
✅ Your workflows get faster.
✅ Your brain gets quieter.
And you suddenly start saying things like “I made a filtered view for that”, which is when you realise… you’ve become That Organised Person.
If you’d like to dive deeper, feel free to explore more of my Notion tutorials or get in touch if you need help building a comprehensive workspace that supports your team’s growth.
💼 Get professional Notion support
Frequently Asked Questions
Can I use Notion as a database?
Yes. In fact, Notion databases are the heart of the whole tool. They’re flexible enough for everything from small personal trackers to full company knowledge systems.
Is Notion database free?
Yes, the free plan includes full access to databases. However, some teams may opt for paid plans to access advanced permissions and facilitate collaborations.
Can Notion AI create a database?
Absolutely. Notion AI can generate database structures and properties tailored to your needs with little effort on your side.
Do Notion databases have a limit?
Notion doesn’t enforce a strict upper limit, but there are practical boundaries you should keep in mind as your workspace grows.
From conversations with the Notion team, you can comfortably organise data at the scale of hundreds of thousands of records.
At that size, databases still perform well as long as your views are clean and you use smart filters.
If you’re working with millions of records and beyond, that’s when you should start thinking about a proper SQL database. Notion is powerful, but it’s not designed to be a heavy-duty data warehouse.
Performance also depends on how you structure things. A few best practices:
- Keep your views simple. Wide views with dozens of visible properties load more slowly.
- Use filters to limit what loads at once.
- Avoid too many formulas or anything recursive that forces Notion to recalculate constantly.
- Rollups are fine, but nesting multiple layers of logic can slow things down.
With a bit of thoughtful setup, even very large databases stay fast and manageable.
Can I access a Notion database offline?
You can view recently opened pages offline. Full offline editing is still limited, so Notion works best with an internet connection.
Sources
- Clinical Productivity System – A Decision Support Model (2010) https://arxiv.org/pdf/1206.0021
- Databases https://www.notion.com/help/category/databases