Building an AI Image Generator in Notion is surprisingly easy. In this tutorial, I’m going to walk you step-by-step through the process of adding Dall-E, a powerful text-to-image Ai developed by OpenAI, to your Notion workspace to create stunning images without ever leaving Notion.
Keep reading to learn how to build the AI Image Generator yourself or scroll to the bottom to download the free Notion template. If you prefer to follow video instructions, then check out this tutorial:
Step 1: Set up your Notion Backend
Create a simple database in Notion with the following properties:
- Prompt – the main property of your Notion database, storing the prompt for the image creation
- Already Used? – a checkbox property to mark prompts already used
Step 2: Get Access to Dall-E API
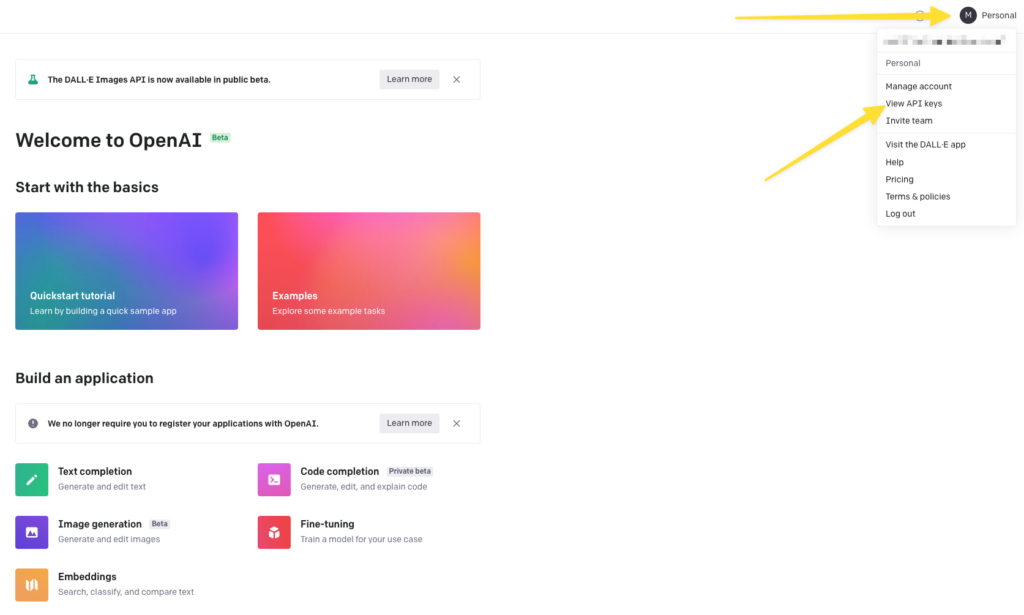
Next, head on over to OpenAI and create an account. After signing in, click on your profile in the top right corner and then on “view api keys“.
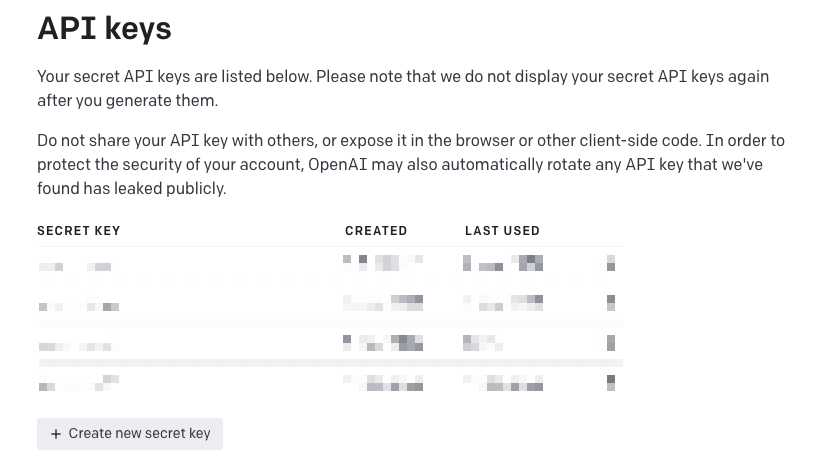
Here, click on “create new secret key” to create a new API key. Copy the key and save it in a secure location. You won’t be able to see the key again after closing the window, so make sure that you savely stored it somewhere.
Step 3: Build Your Automation
Log into your Make account (or use this link to create a new account – the free plan will be sufficient) and create a new scenario.
Get the prompts for the images from Notion into the automation
Add the Notion Module “Watch Database Items” as the first module your automation and set it up to watch for updated items in your Notion database from Step 1.
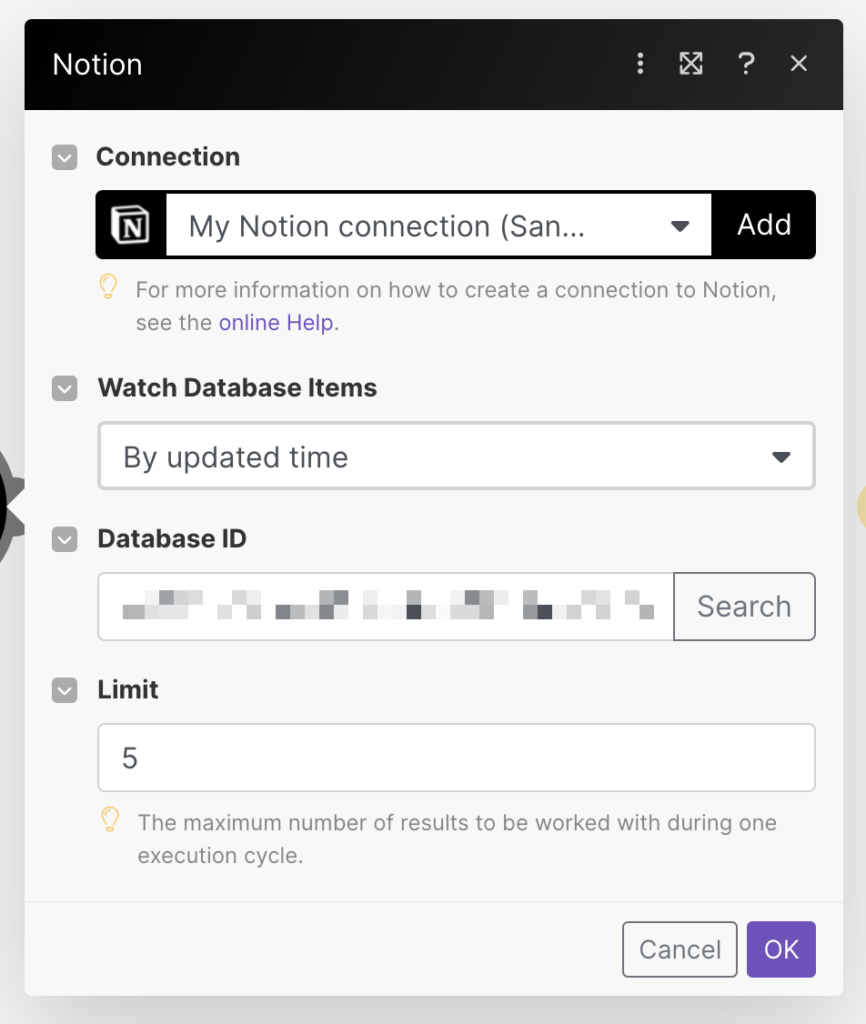
Send an API request to OpenAI
Now set up an HTTP module “Make a request” to send the prompt from your Notion database to the OpenAI Api.
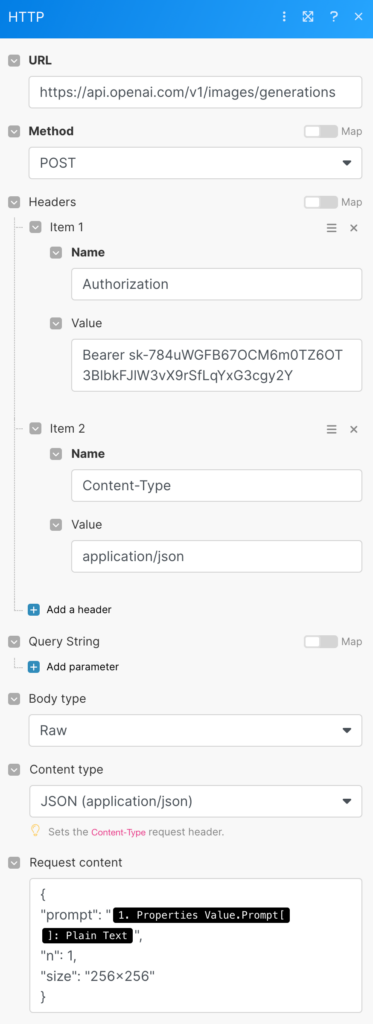
Make sure to set the Body Type to Raw, Content type to JSON and include the following code in the Request Content:
{
“prompt”: “{{1.properties_value.Prompt[].plain_text}}”,
“n”: 1,
“size”: “256×256”
}
Don’t forget to set Parse response to yes so that you can continue working with the result that OpenAI will send back.
Download the generated image from OpenAI
If everything is set up correctly, you will receive a URL back from OpenAI that leads to the image created. This link will expire after an hour, so you need to download the image.
You can do so by adding another http module to your automation called “Get a file“. Pull in the URL from the previous step.
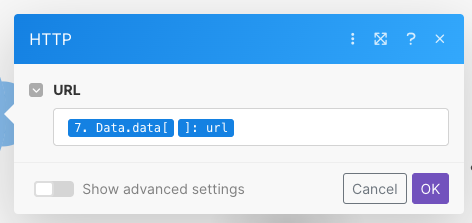
Add your image to Notion
Last but not least, it’s time to add the generated image to Notion.
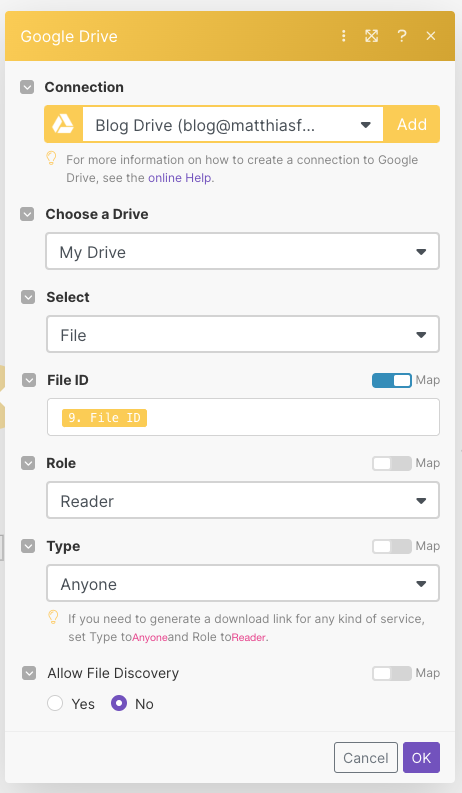
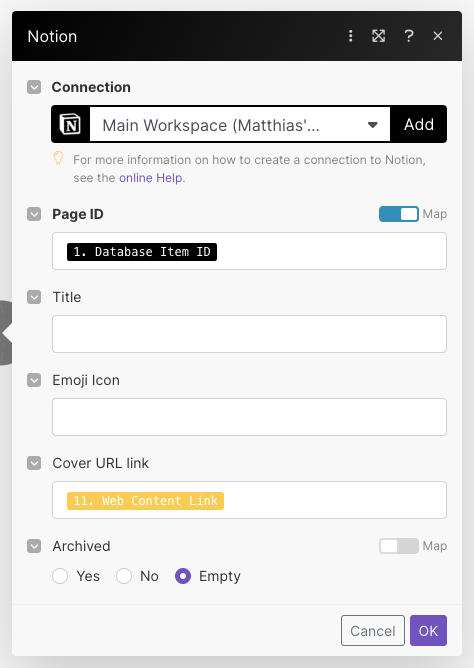
Unfortunately, you can’t upload images through the Notion API as of now. But you can set a cover image. To do so, you’re going to upload your image to Google Drive (or Dropbox like in this guide), create a share link for the file and then add that share link as the url for the cover image.
Start by adding a “Upload a file” module for Google Drive and upload your image from the previous step to any desired folder:
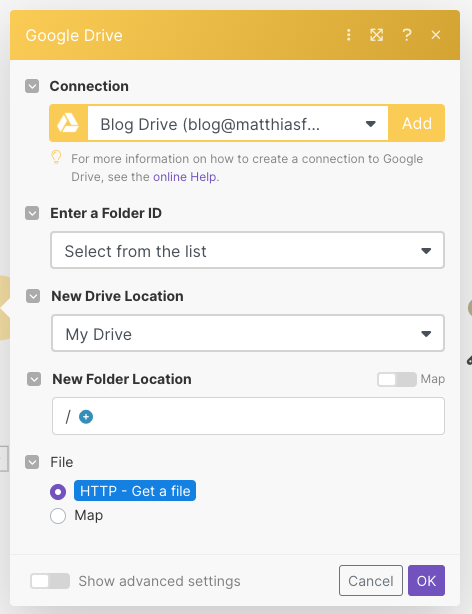
Next, add the “Get a share link” module and create a public URL for the image.
Now, use the “Update a page” Notion module to set the URL as your cover image.
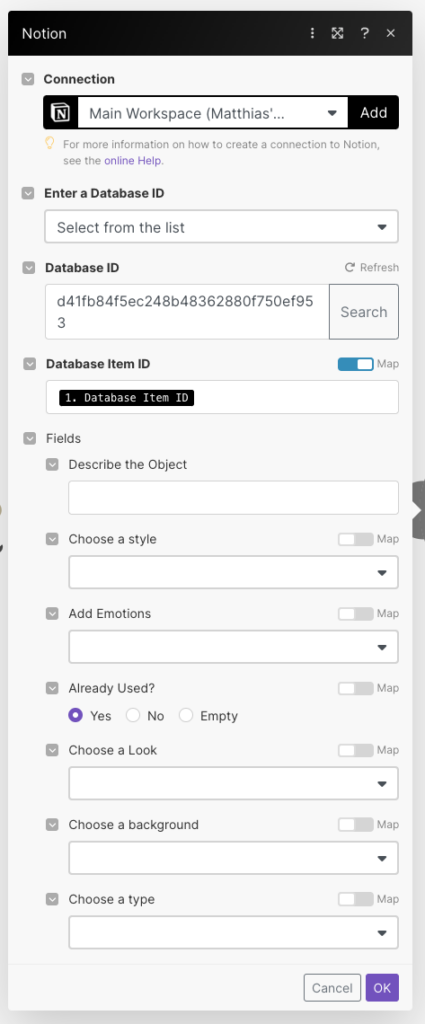
And last but not least, make sure to check off the checkbox for “Already used?” in Notion so that you don’t keep pulling in the same prompts:
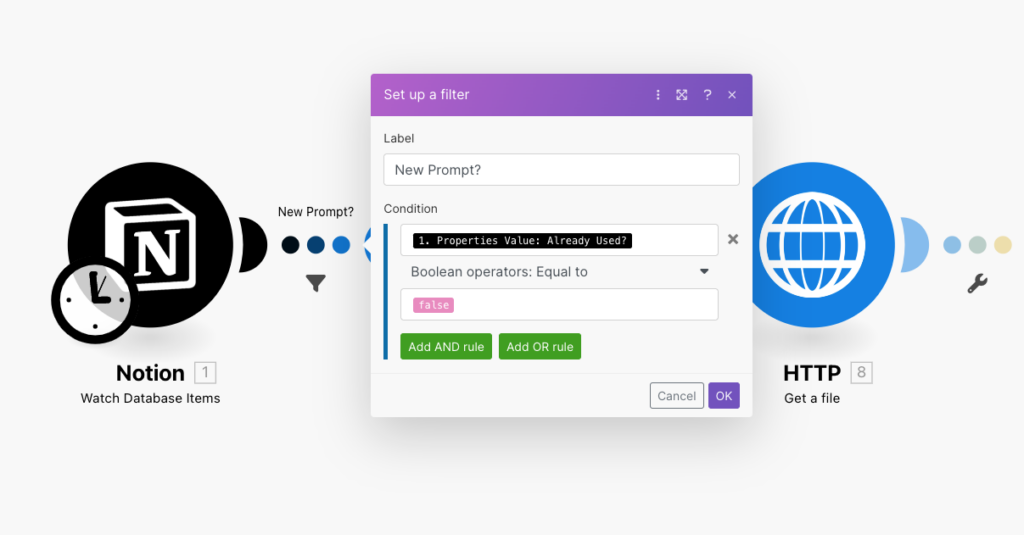
Once you’re done with all these modules, set up a filter after the first module to ensure that no prompts pass through the automation that were used before:
Step 4: Generate anything you want
Your automation is ready!
Simply add prompts to your Notion database and run the automation (or schedule it to run automatically). Don’t know which prompts to use? Head over to the web interface of Dall-E and browse through the collection of images. Simply pick a style that you like and start modifying the prompt.
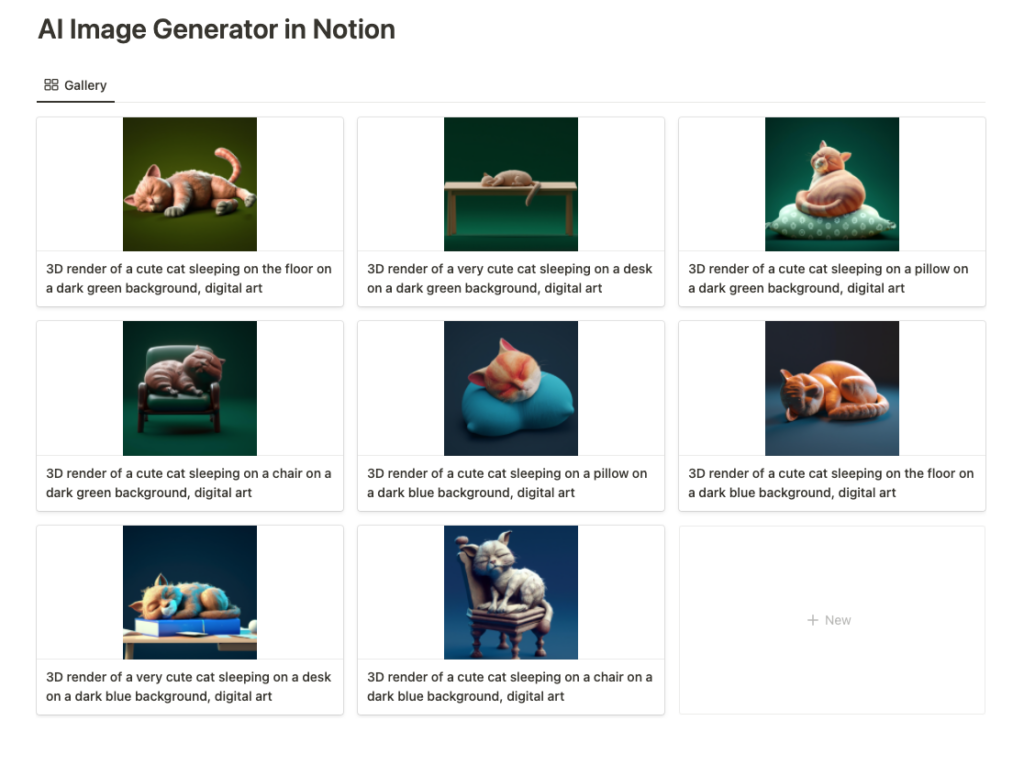
Here’s how it looks if you use the prompt “3D render of a cute cat sleeping on a pillow on a dark green background, digital art” and swap out the background color and object that the cat is sleeping on:
Get the free AI Image Generator in Notion Template
You can download this Notion Template plus another 21+ other free templates here:


